Preface
There is a veritable plethora of videos and articles on how to setup a digital Zettlekästen. There are tons of blogs and forums about Niklas Luhmann’s practice, his prolific publishing record.
So why add another one? Frankly most of them aren’t that helpful. I learn by seeing how something is actually done, especially an analog process. And more importantly, I want it to be true to the process Luhmann discovered. I know there are other methods out there, but this one is specifically for the Zettlekästen, so I want an authentic breakdown.
This post is the culmination of hundreds of hours of research and practice of trying to do an analog zettlekästen “the right way”, or as close to it as makes sense.
If you’re looking for something like that for yourself, read on. This post is for you if you have a good idea of what it is and why it’s awesome, but it’s unclear how to get started with your analog. So I’m going to assume you’re familiar with Niklas Luhmann, what a Zettlekästen is, and general information about it. I just want to focus on the nuts and bolts of working in an analog system.
If you’re not familiar with what it is, checkout these resources:
- Read this. It’s short, to the point, and by someone who studied Luhmann’s process in detail.
- Luhmann wrote an expository paper on his process. Some good nuggets in there.
- I’m indebted to Scott Scheper’s YouTube videos. His videos cleared up a lot of misconceptions for me, and I believe he’s working on a book on this subject!
Equipment setup
Ok, you’re ready to start an analog Zettlekästen (slipbox). Here’s what you need
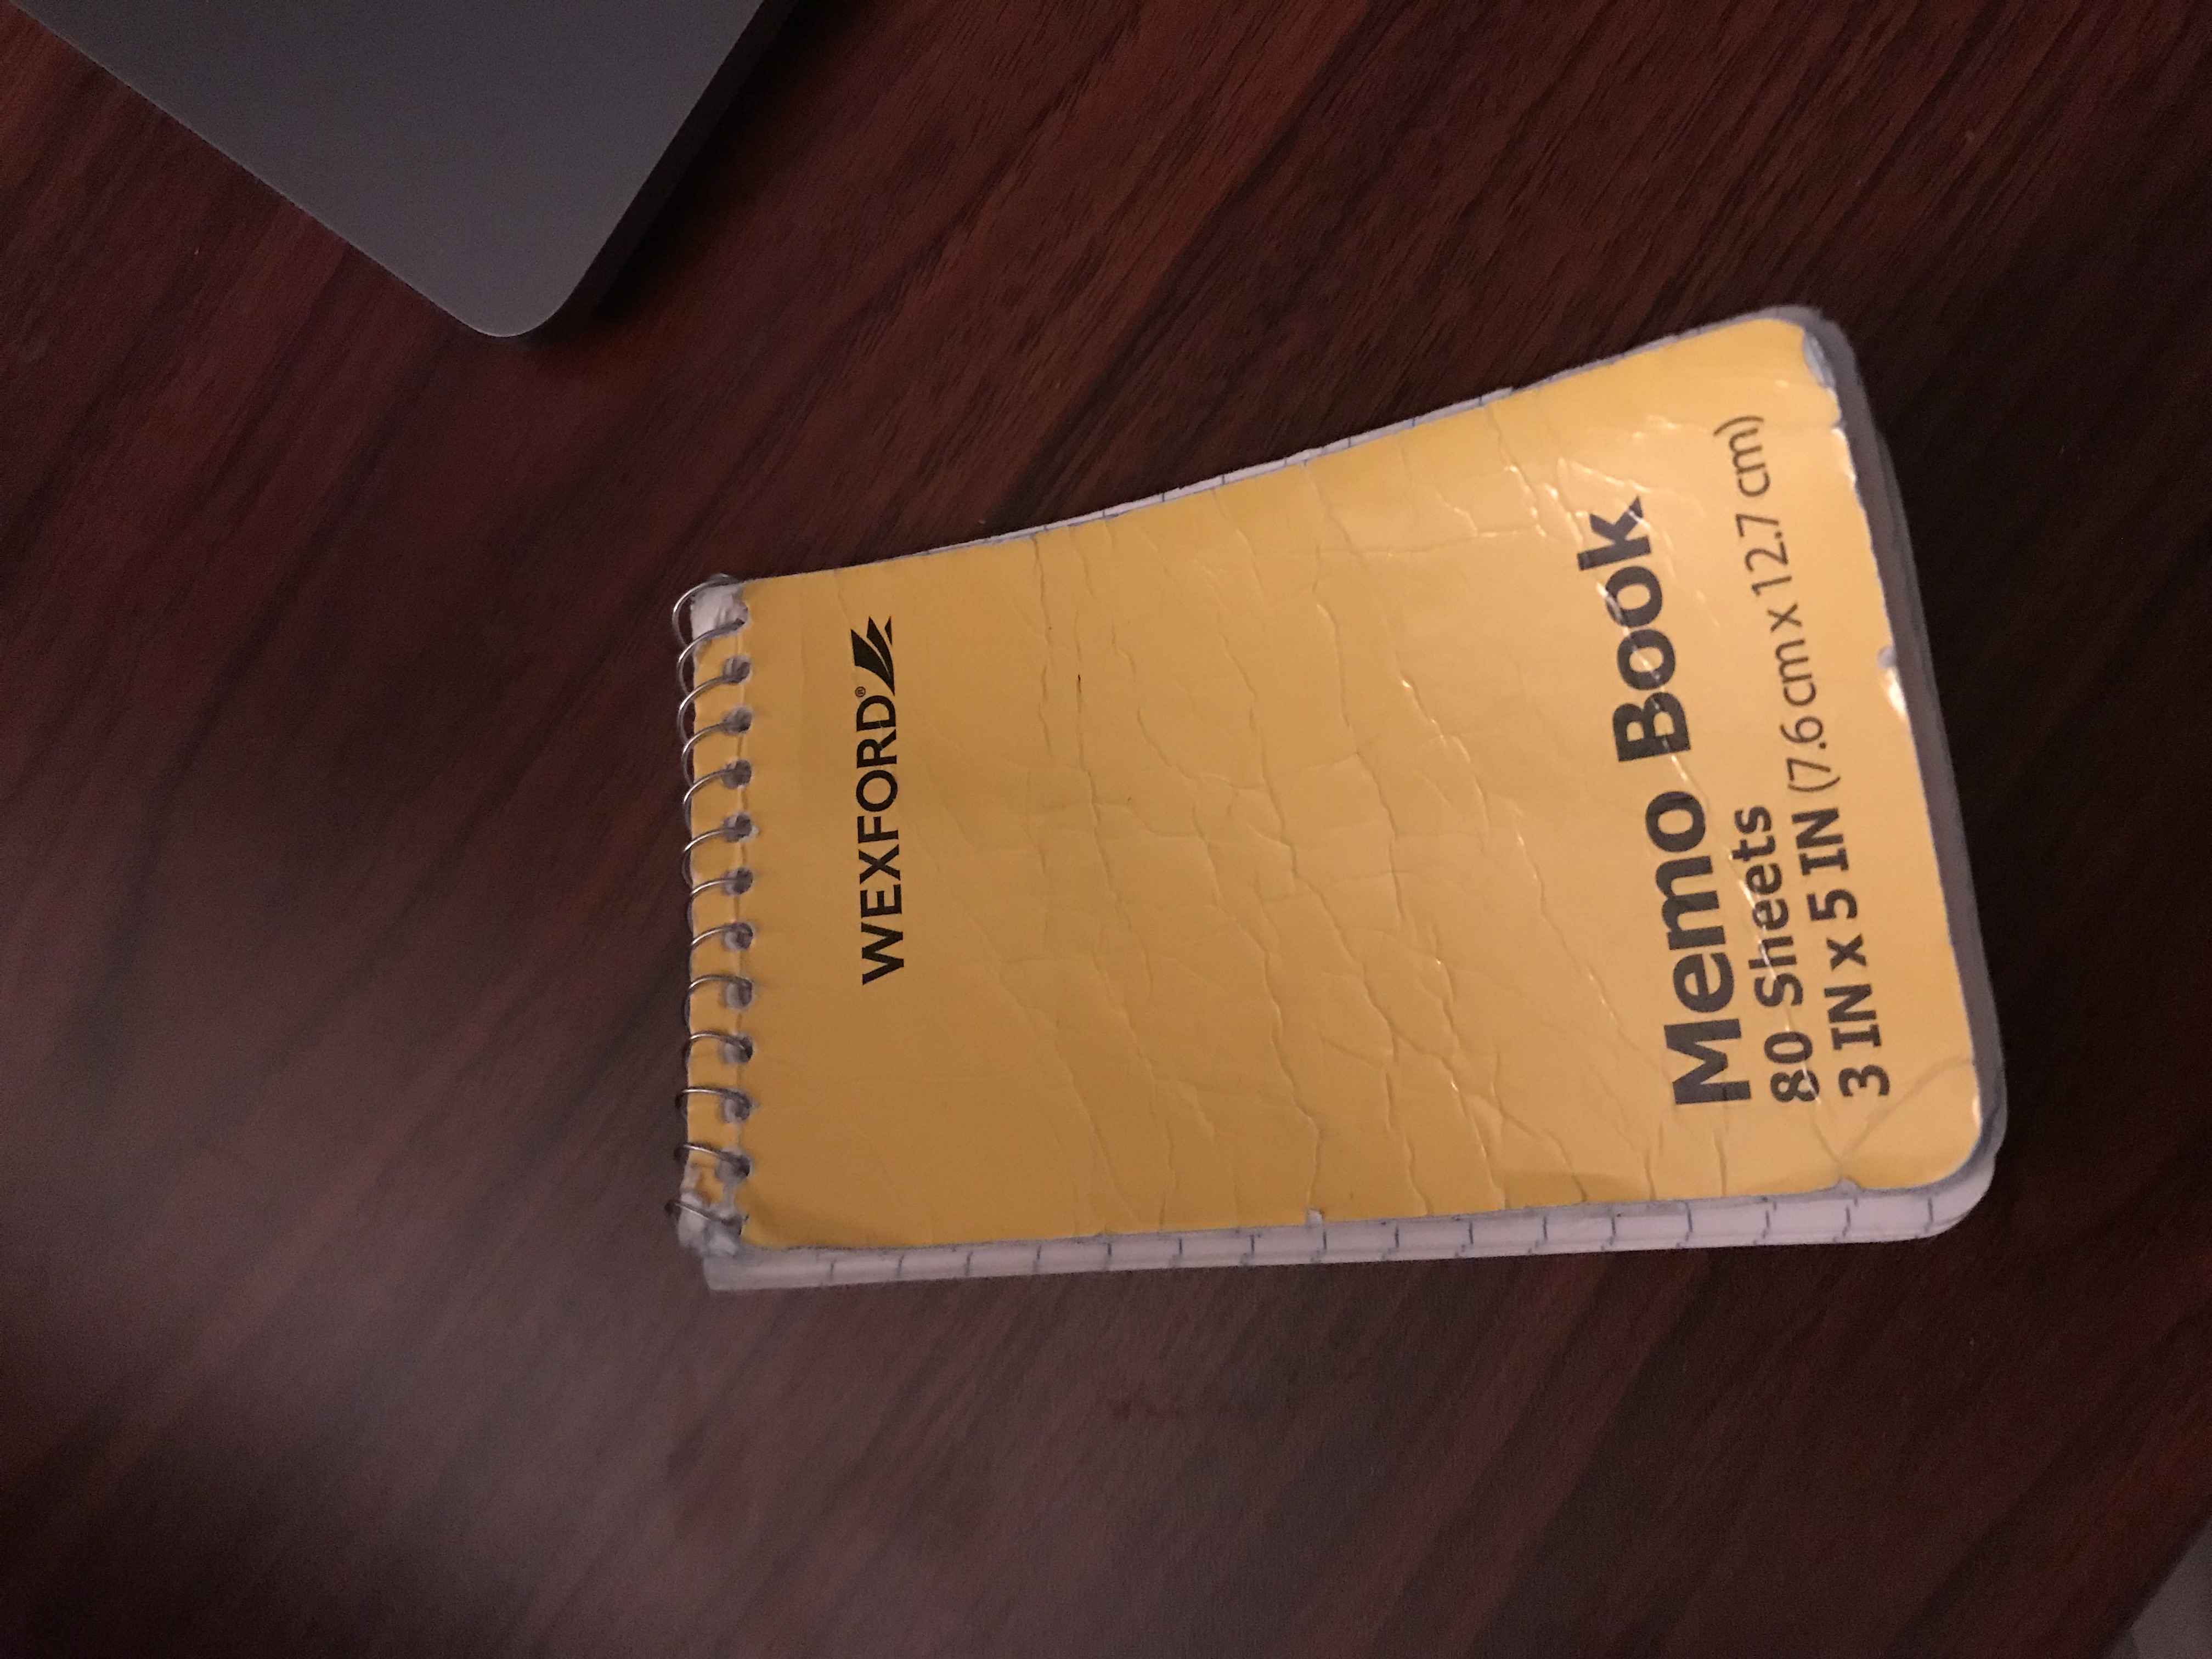
1. Some 4x6 cards

2. A Pen and a Pencil
I make all of my writing in black ink and use a red ink pen to highlight connections and footnotes. If your perfectionism gets in the way, start with a pencil, then you can always make changes easier as you get the hang of it.
3. Permanent note box
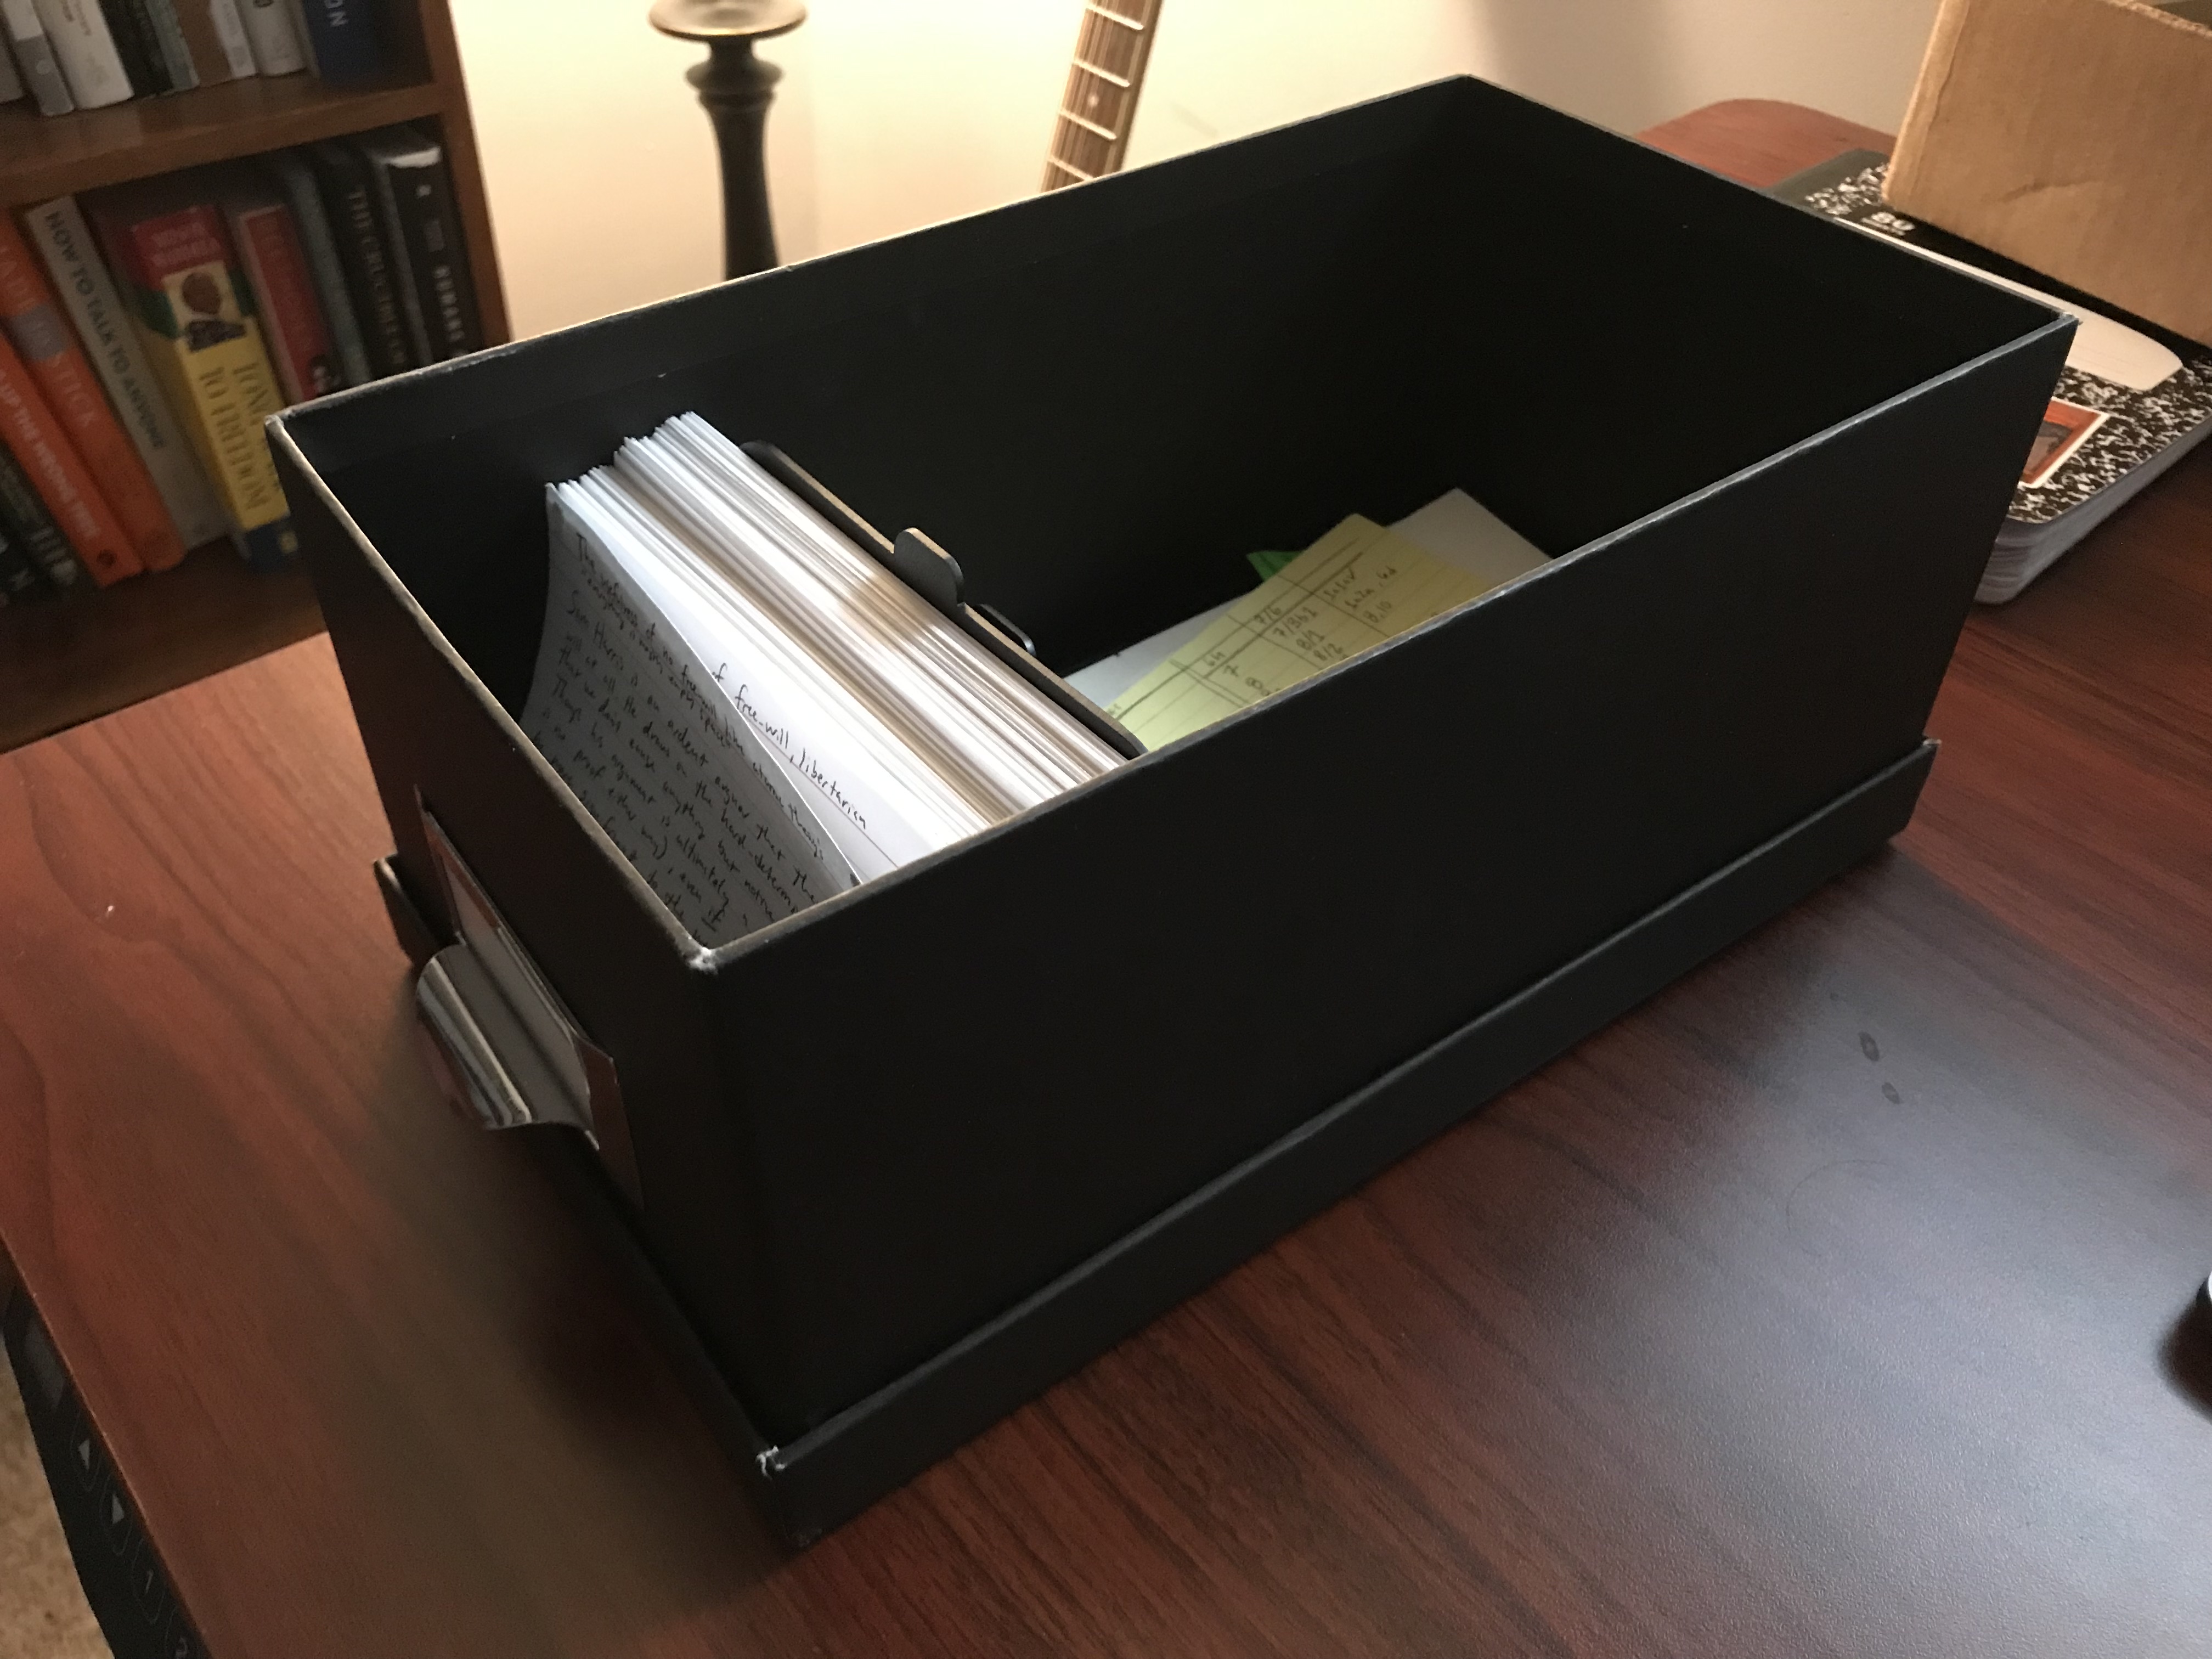 I acquired this handsome box here but you could easily put one together. You just want something that allows your cards to standup so you can easily rifle through them.
With your notes in a dedicated box, you won’t have to worry about them getting mixed up on your desk, lost, etc.
4. Bibliography index box
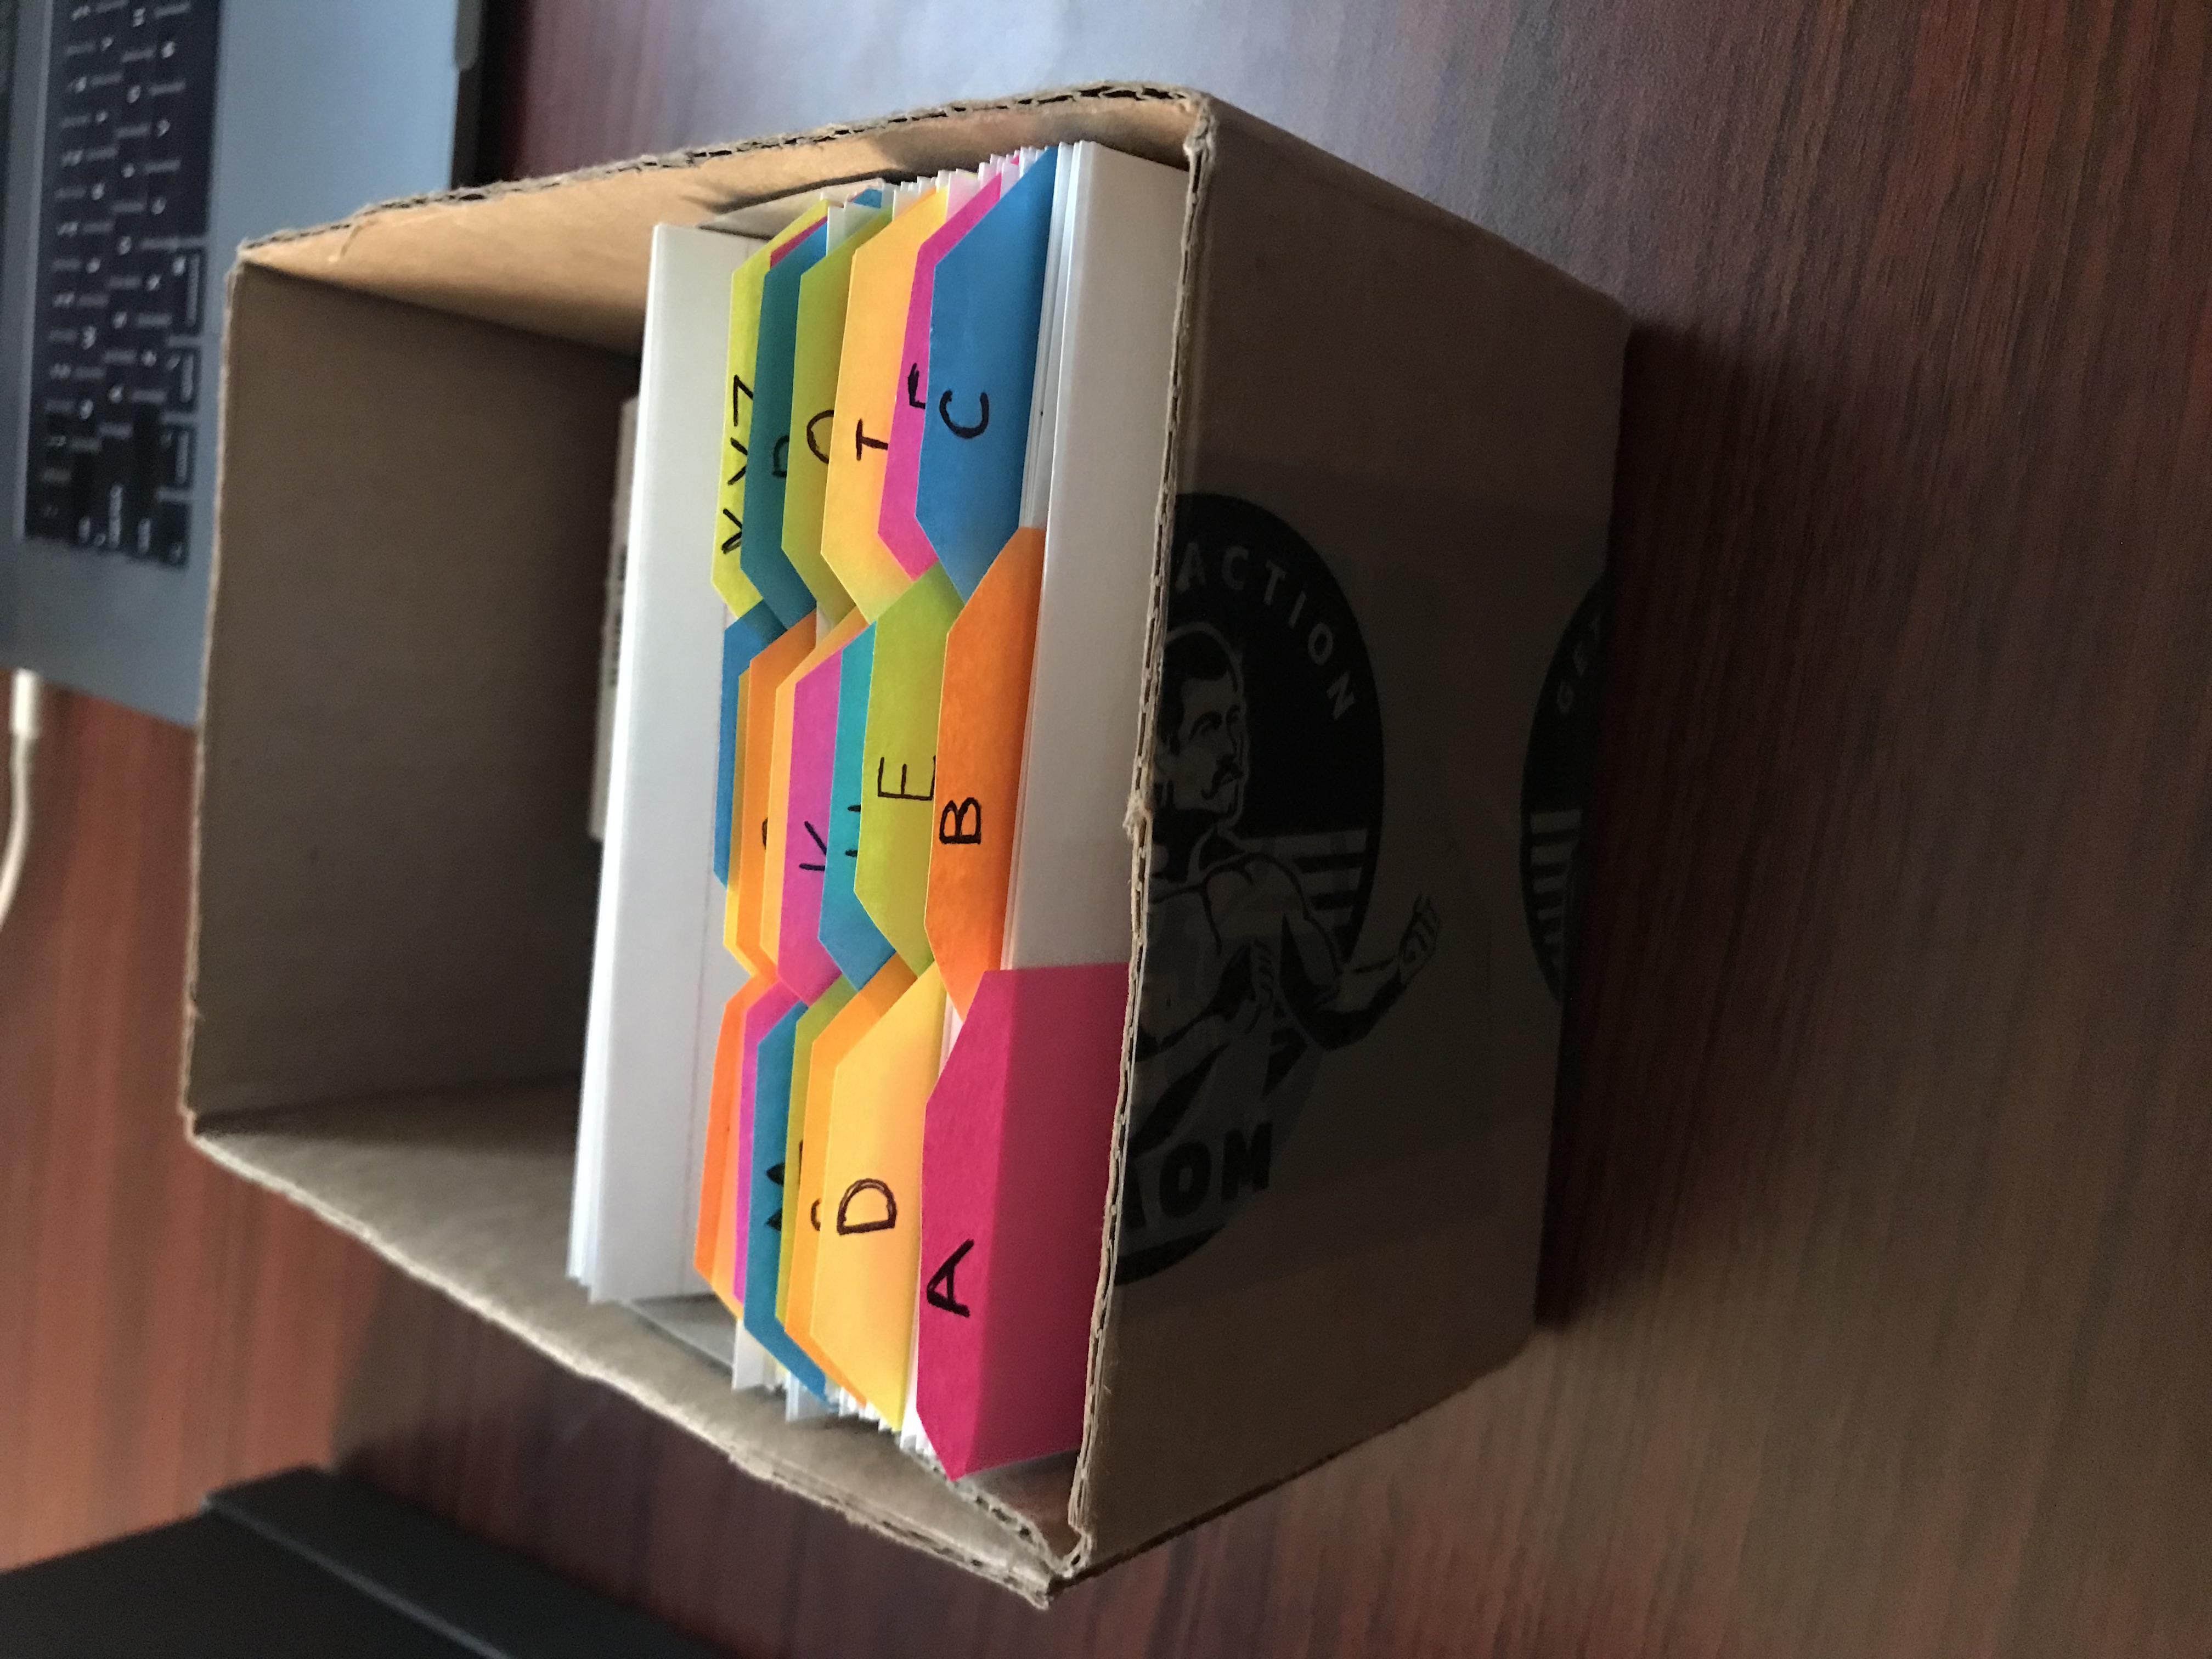 I made mine from a box that just happened to fit 3x5 cards perfectly. Some tape, sticky notes and voila!
This is a box that holds references to authors. Literature notes live on the backside of the bibliography card (more on that later).
I made mine from a box that just happened to fit 3x5 cards perfectly. Some tape, sticky notes and voila!
This is a box that holds references to authors. Literature notes live on the backside of the bibliography card (more on that later).
5. Keyword index box
You might be thinking? What, another box? Do I really need three boxes to take notes? No, you don’t need it, but as your permanent notes grow, you’ll start to notice topic clusters emerging from the bottom up in ways you couldn’t have forseen or planned. This index helps keep track, not plan for, topics related to keywords as they arise.
For example, if I see my new card is related to communication, I’d head to the ‘C’ tab in my keyword index and look for ‘Communication’. If it wasn’t there, I can add it (more on that below). Here’s my keyword index box:
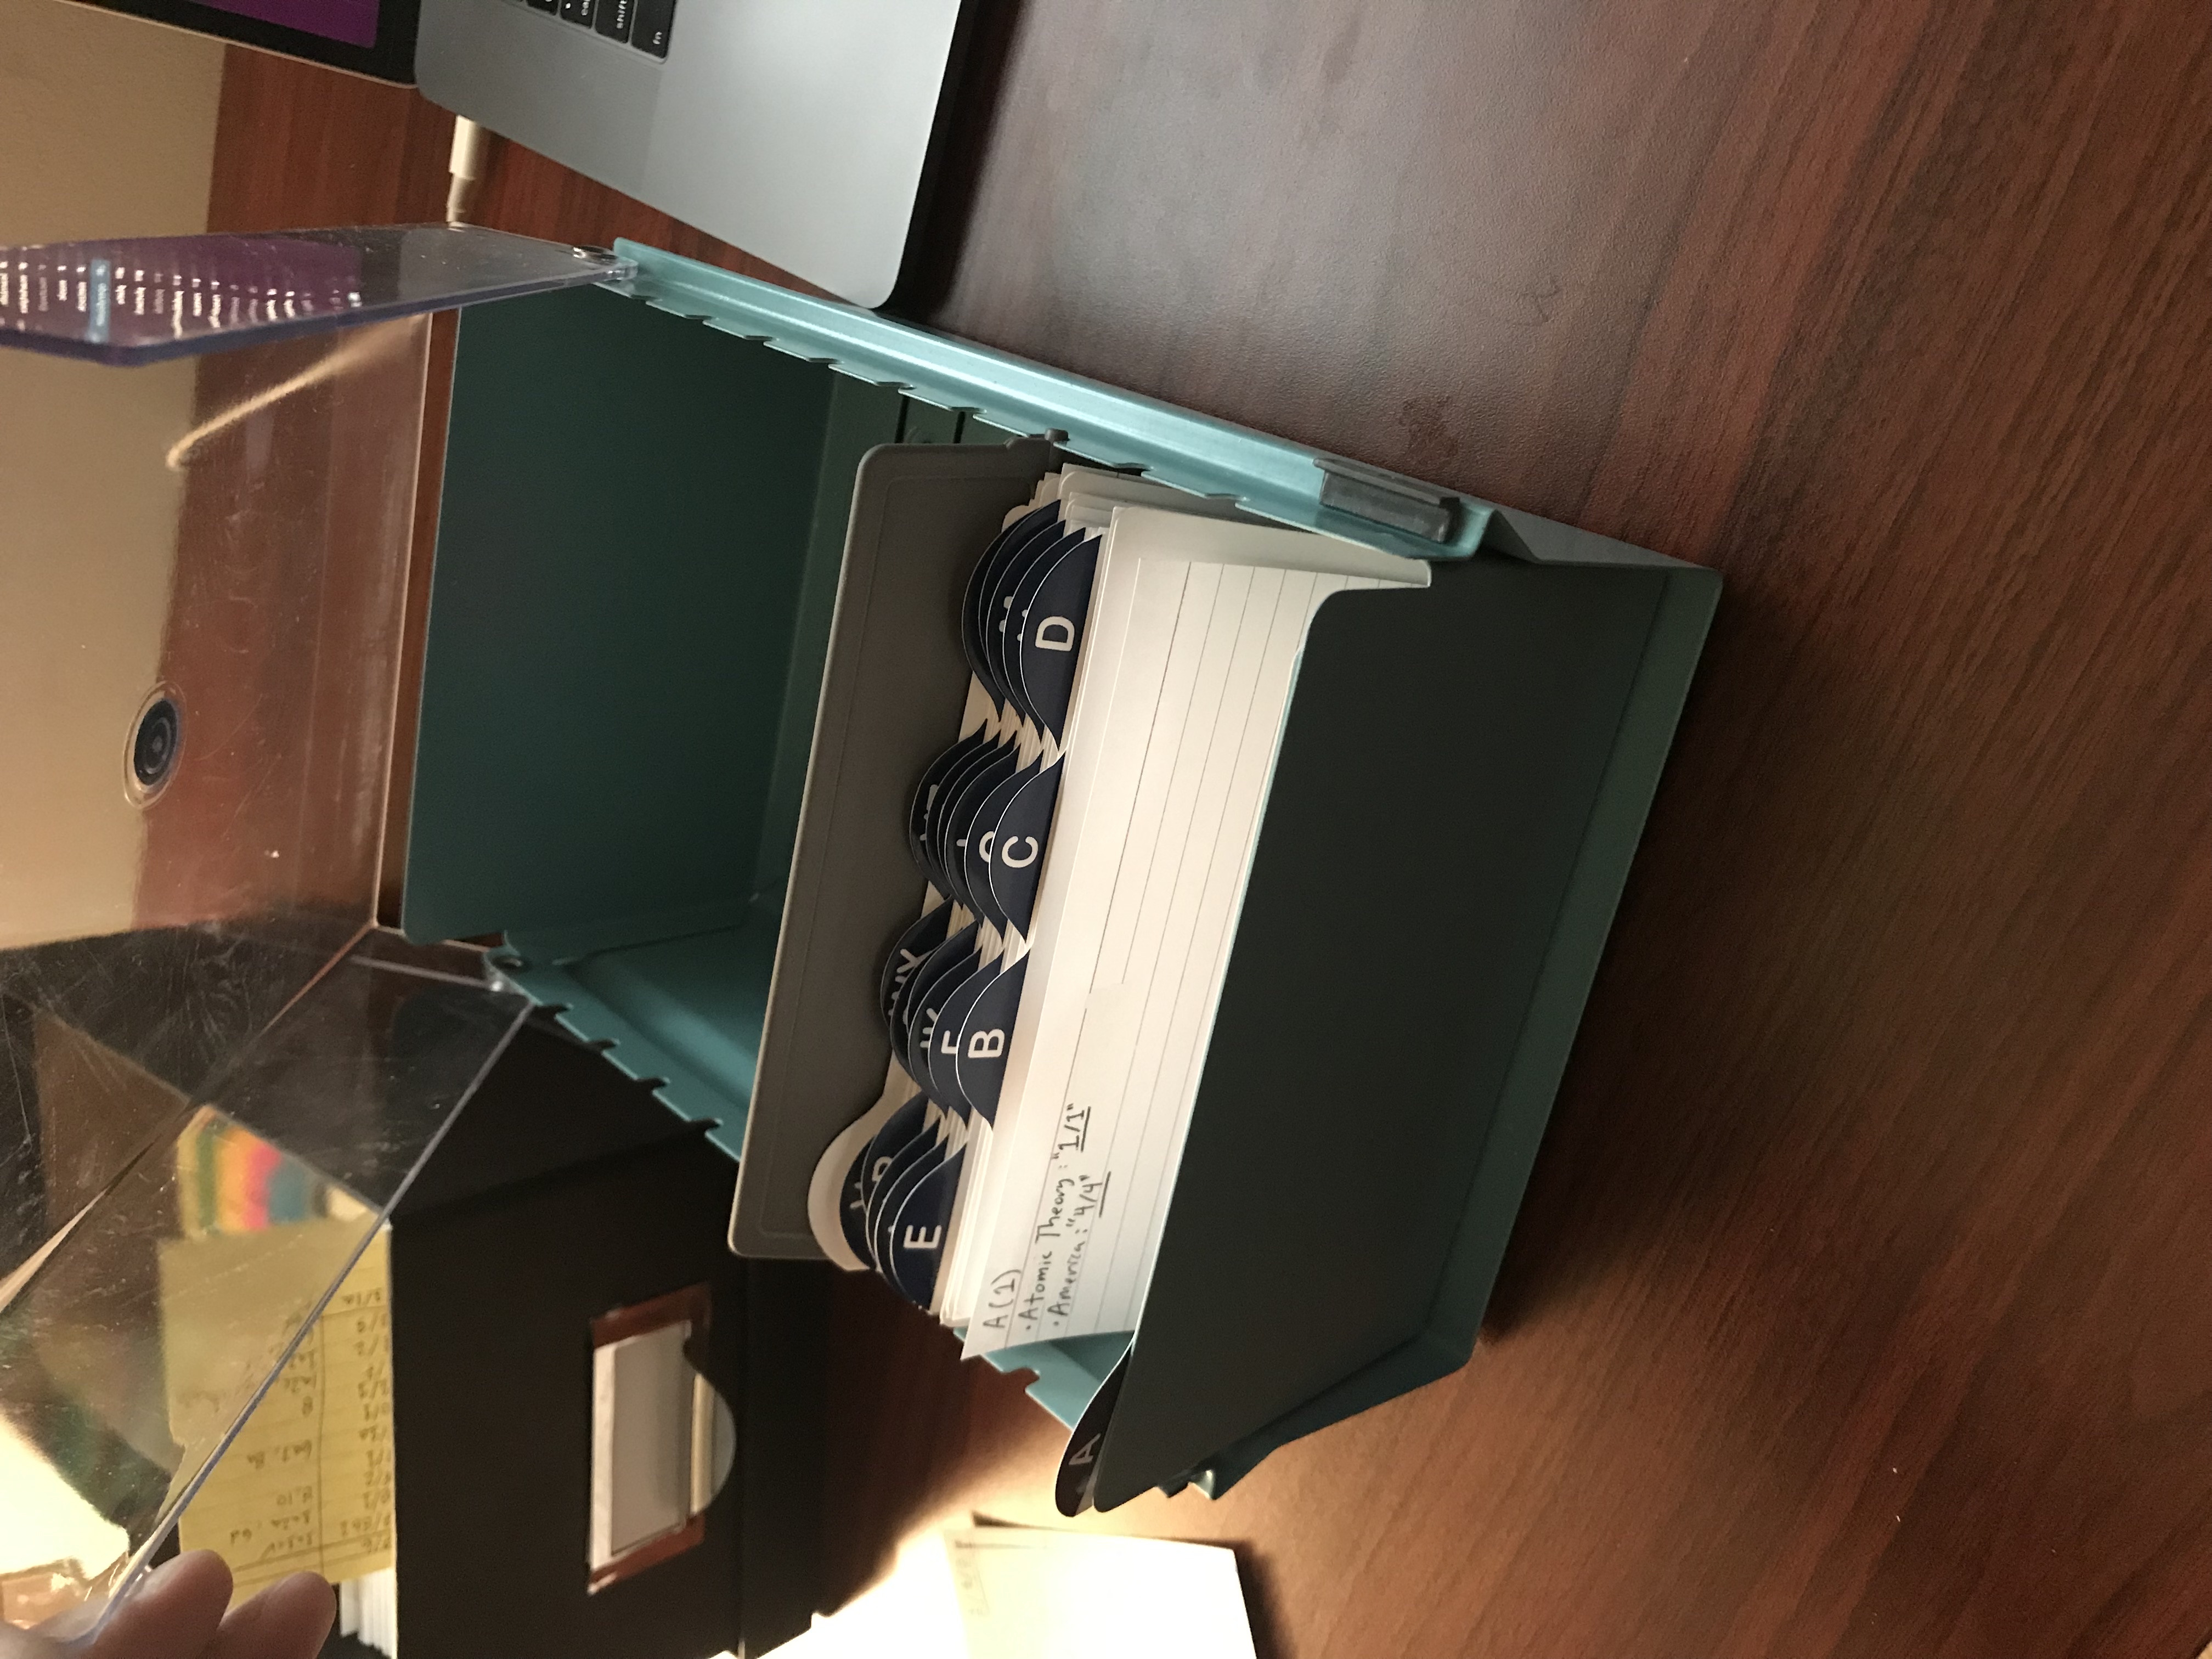
Example keyword index card:
6. Fleeting notes
One extra piece that Sönke Ahrens recommends is a little notebook to capture what he calls “Fleeting Notes”. This is not part of Luhmann’s original system or practice. However it’s served me well. I carry it around in my backpocket and when I get an idea I write them down. As Ahrens describes in his book, these notes are ‘fleeting’ (i.e. if you lost it, it wouldn’t be a big deal); as you collect ideas in there, sit down and transfer ones you like to your Permanent Notes (the 4x6 cards).
Here’s a picture of what I use for fleeting notes:
So far this covers the “technology” required for an analog Zettlekästen. All that’s left is you, your mind, and stuff to read and think about. Now let’s talk process.
Process
High-level process: Read -> Think -> Write Zettle -> File Zettle
With all these boxes and rules, it’s intimidating to start, at least it was for me. I struggle with perfectionism (that darn fixed mindset again!) and I didn’t want to build a pile of notes only to realize I did something horribly wrong. Honestly, as great as Ahrens' book is, it didn’t give me a lot to go on for implementing (which is kinda misleading for a book entitled “How to Take Smart Notes”. A more honest title would be “Why you should take smart notes”, but I digress) and I did eventually run into problems. I got about 60 cards in and had done my bibliographies wrong (on the backs of each zettle) and a clunky indexing system based on alternating numbers and letters. It was a painful lesson, one that took time and effort to fix but I’m glad I did it right. That’s why I’m writing this for all the other perfectionists out there who want to try this.
So let’s break it down further!
1. Start with Reading
As a member of The Online Great Books I’m always reading. Right now I’m reading The Odyssey by Homer. For purposes of groking the process, let’s pretend I just started.
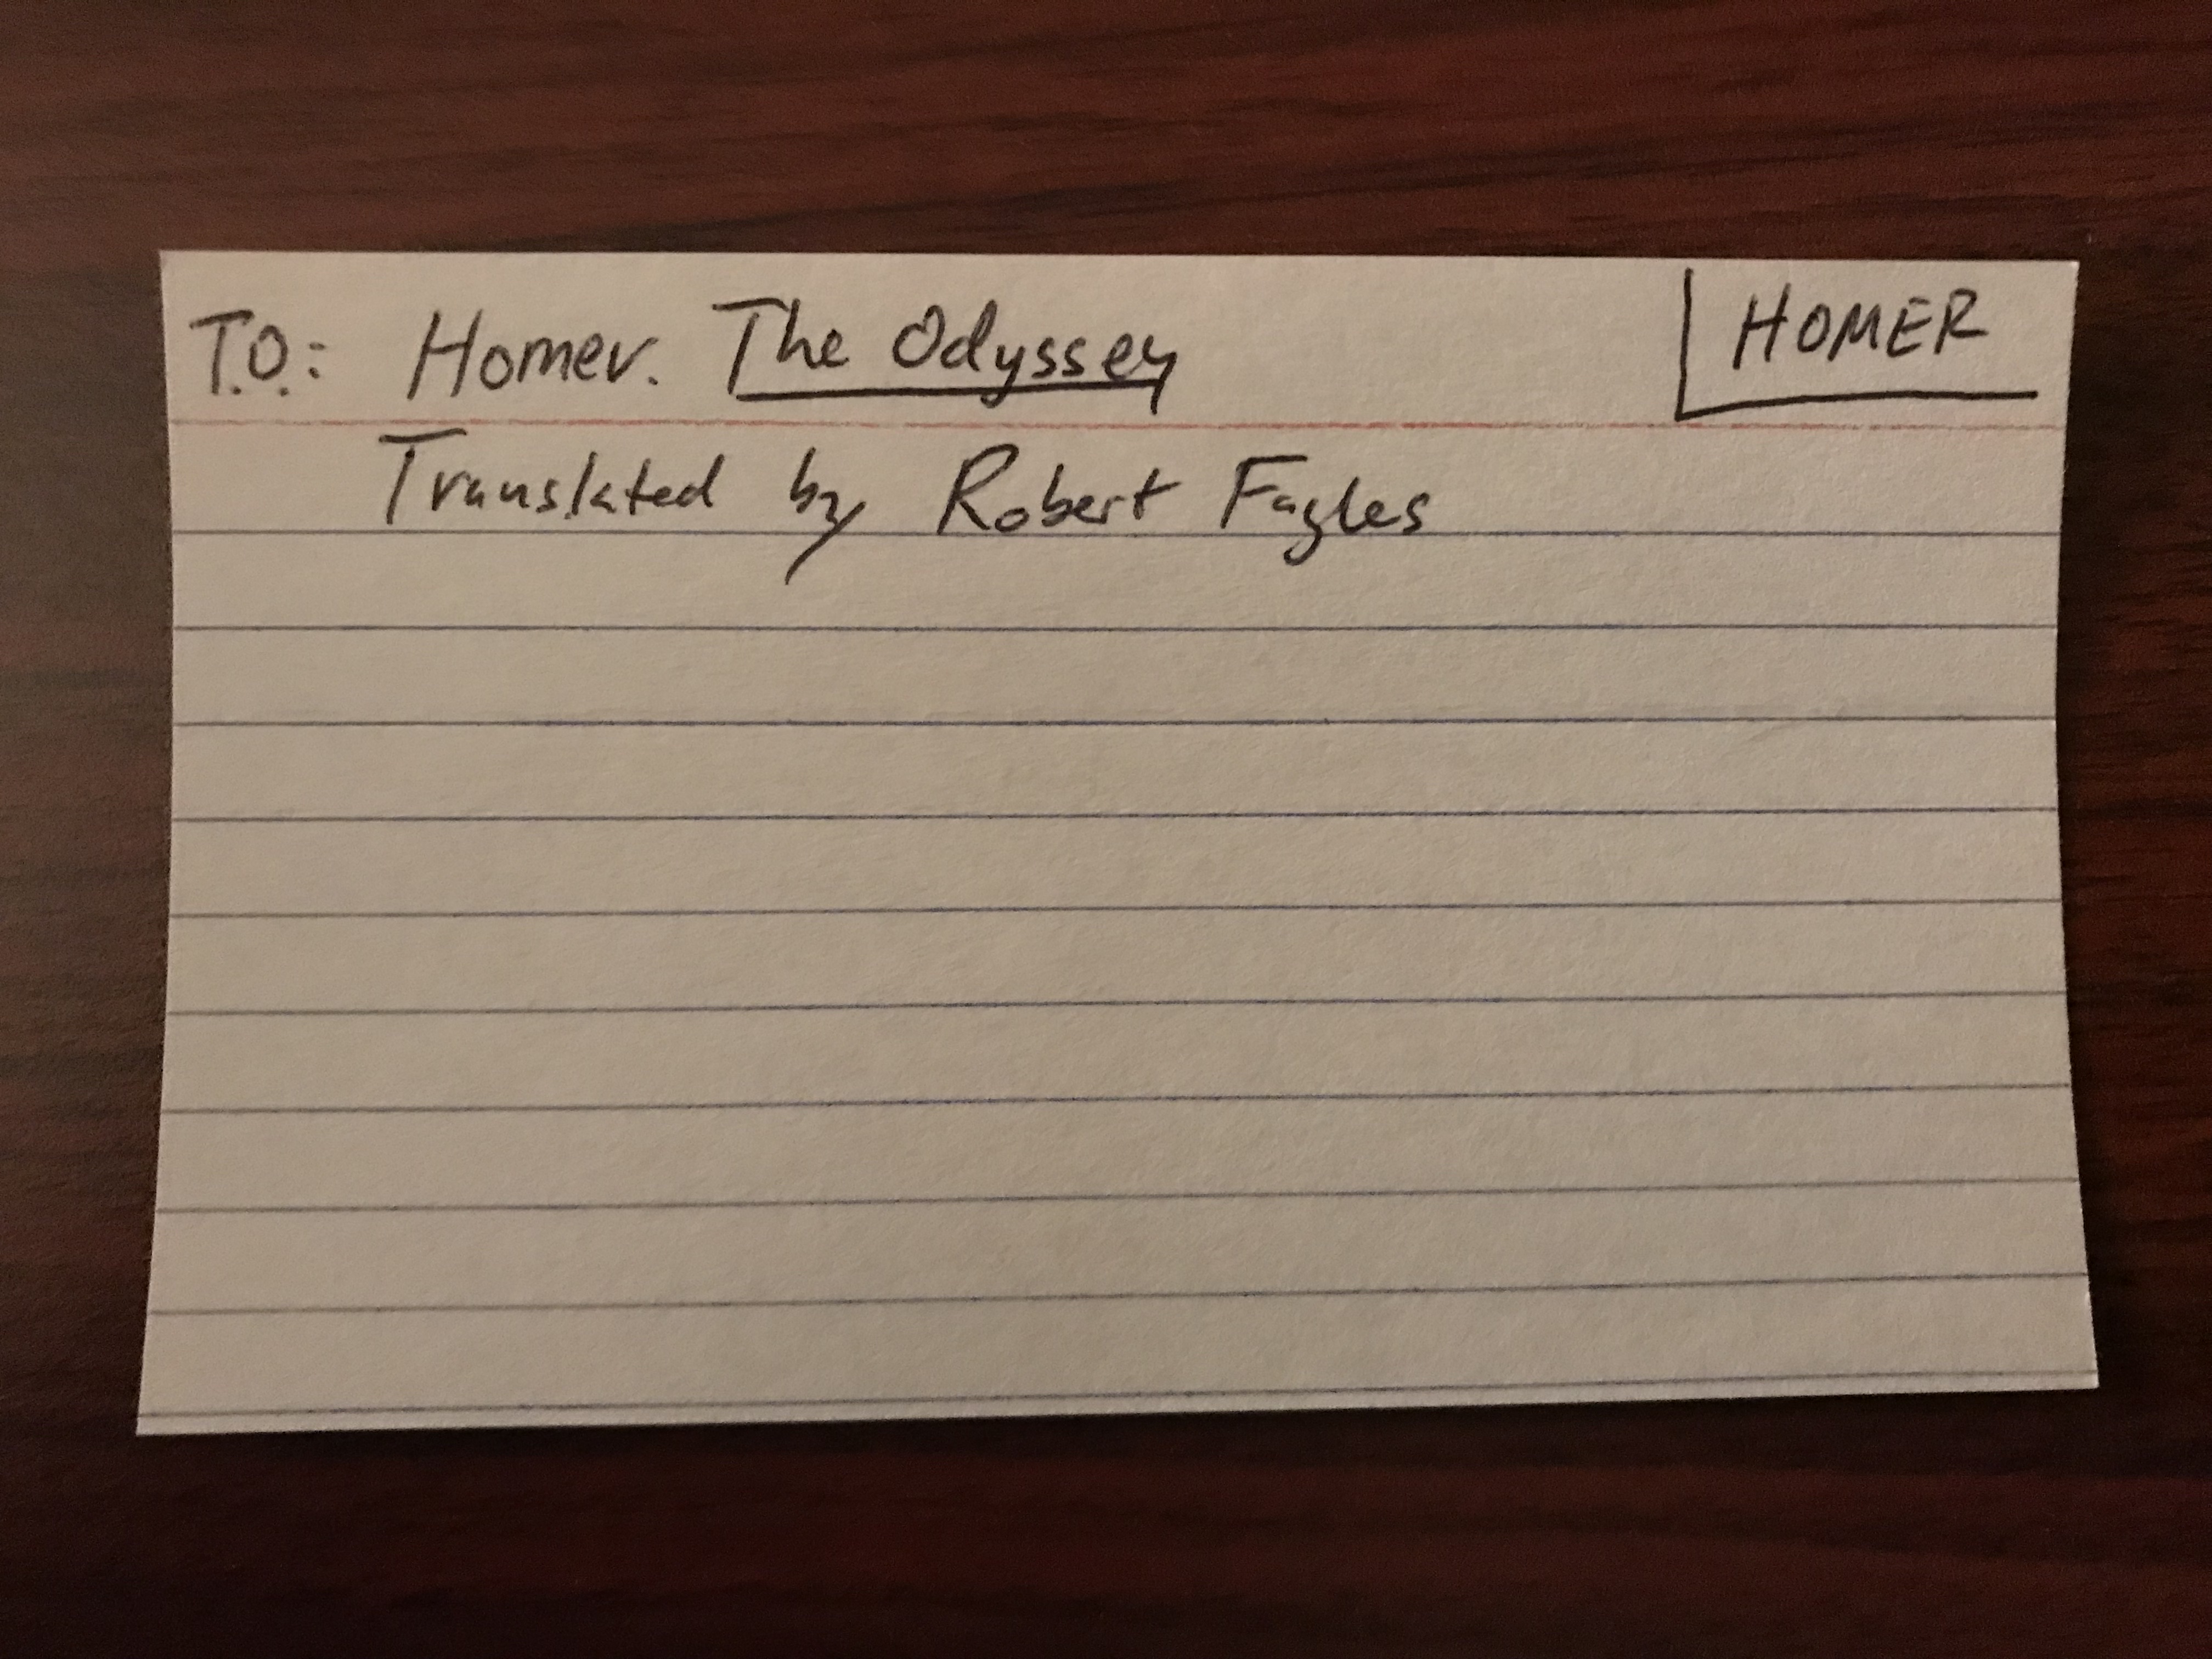
2. Create a Bibliography index card
This part was very confusing for me initially. Ahrens talks about the relationship between Literature Notes and the Bibilography card on page 44:
“All [Luhmann] did was take brief notes about the ideas that caught his attention in a text on a separate piece of paper:
“I make a note with the bibliographic details. On the backside I would write ‘on page x is this, on page y that’, and then it goes inot the bibliographic slip-box where I collect everything I read”
Here’s how I do it: First step is to make my bibliography card. One book –> one bibliography index card.
On the front, I have the author’s last name in a box in the upper right hand. I only do this to make it easy to see.
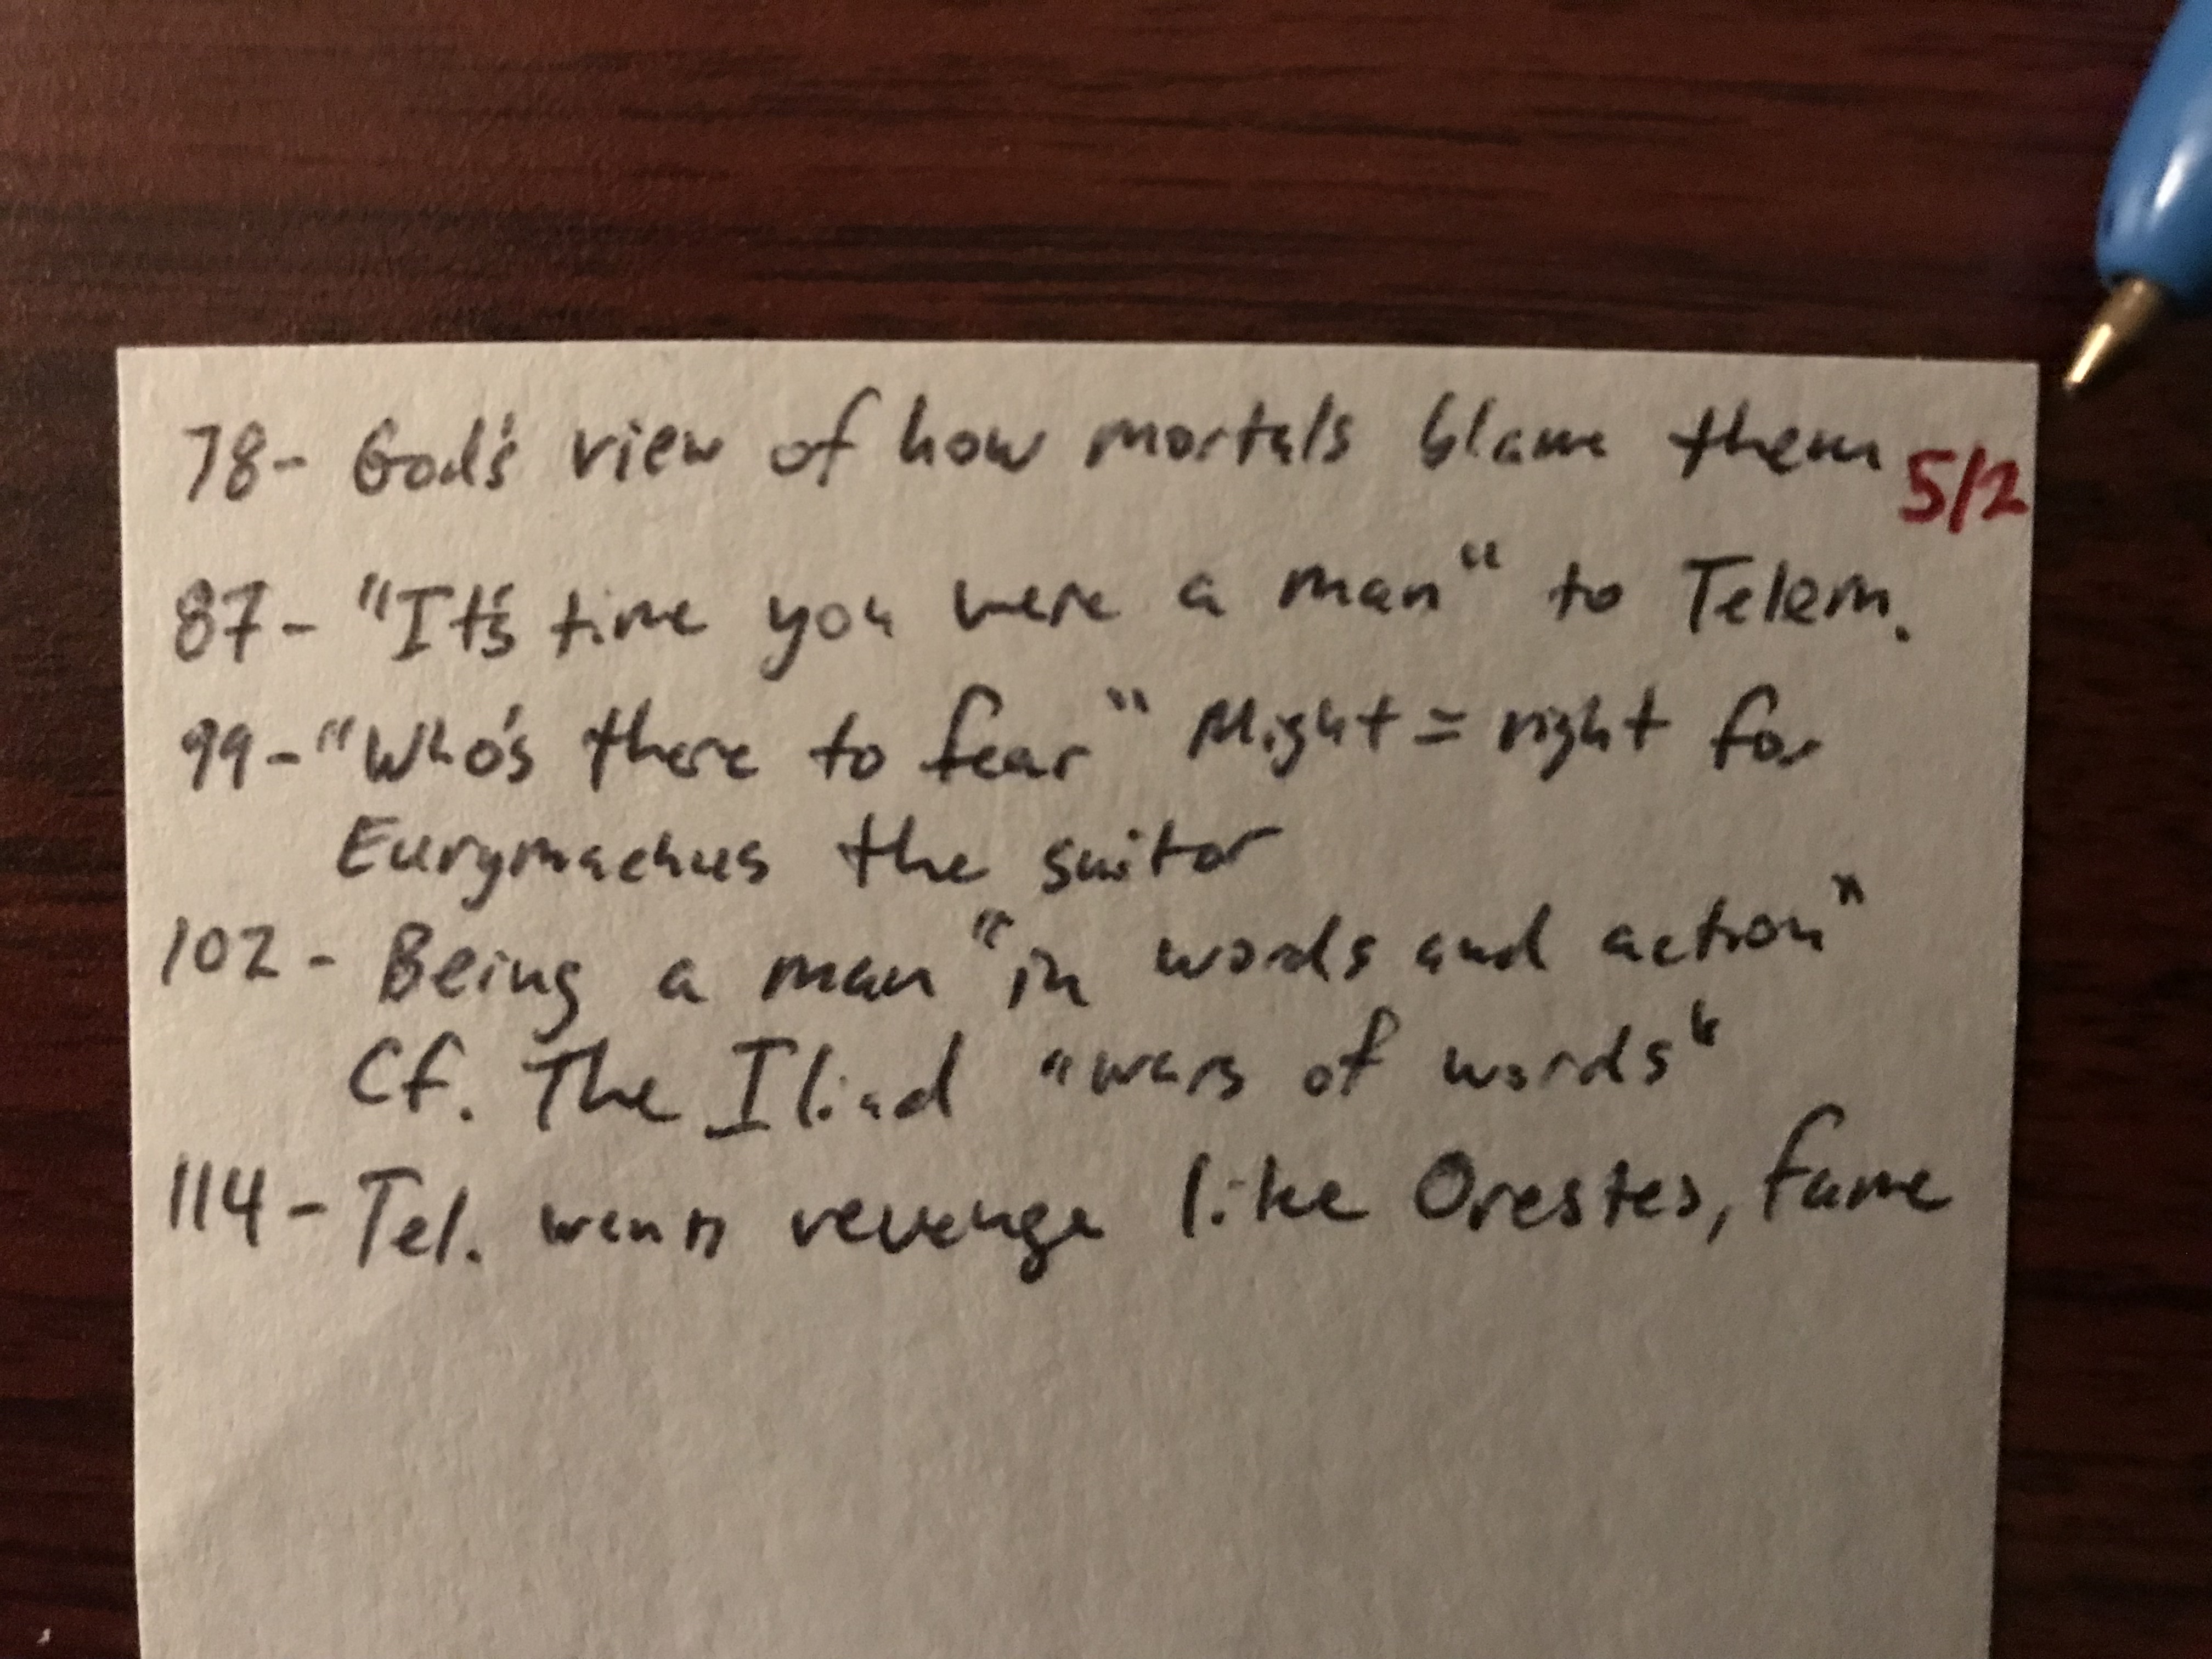
 Then, while I’m doing my weekly reading, I keep the note in the book and jot down the page number and ideas on the backside of the card as they come to me. According to Ahrens:
“Keep it very short, be extremely selective, and use your own words”
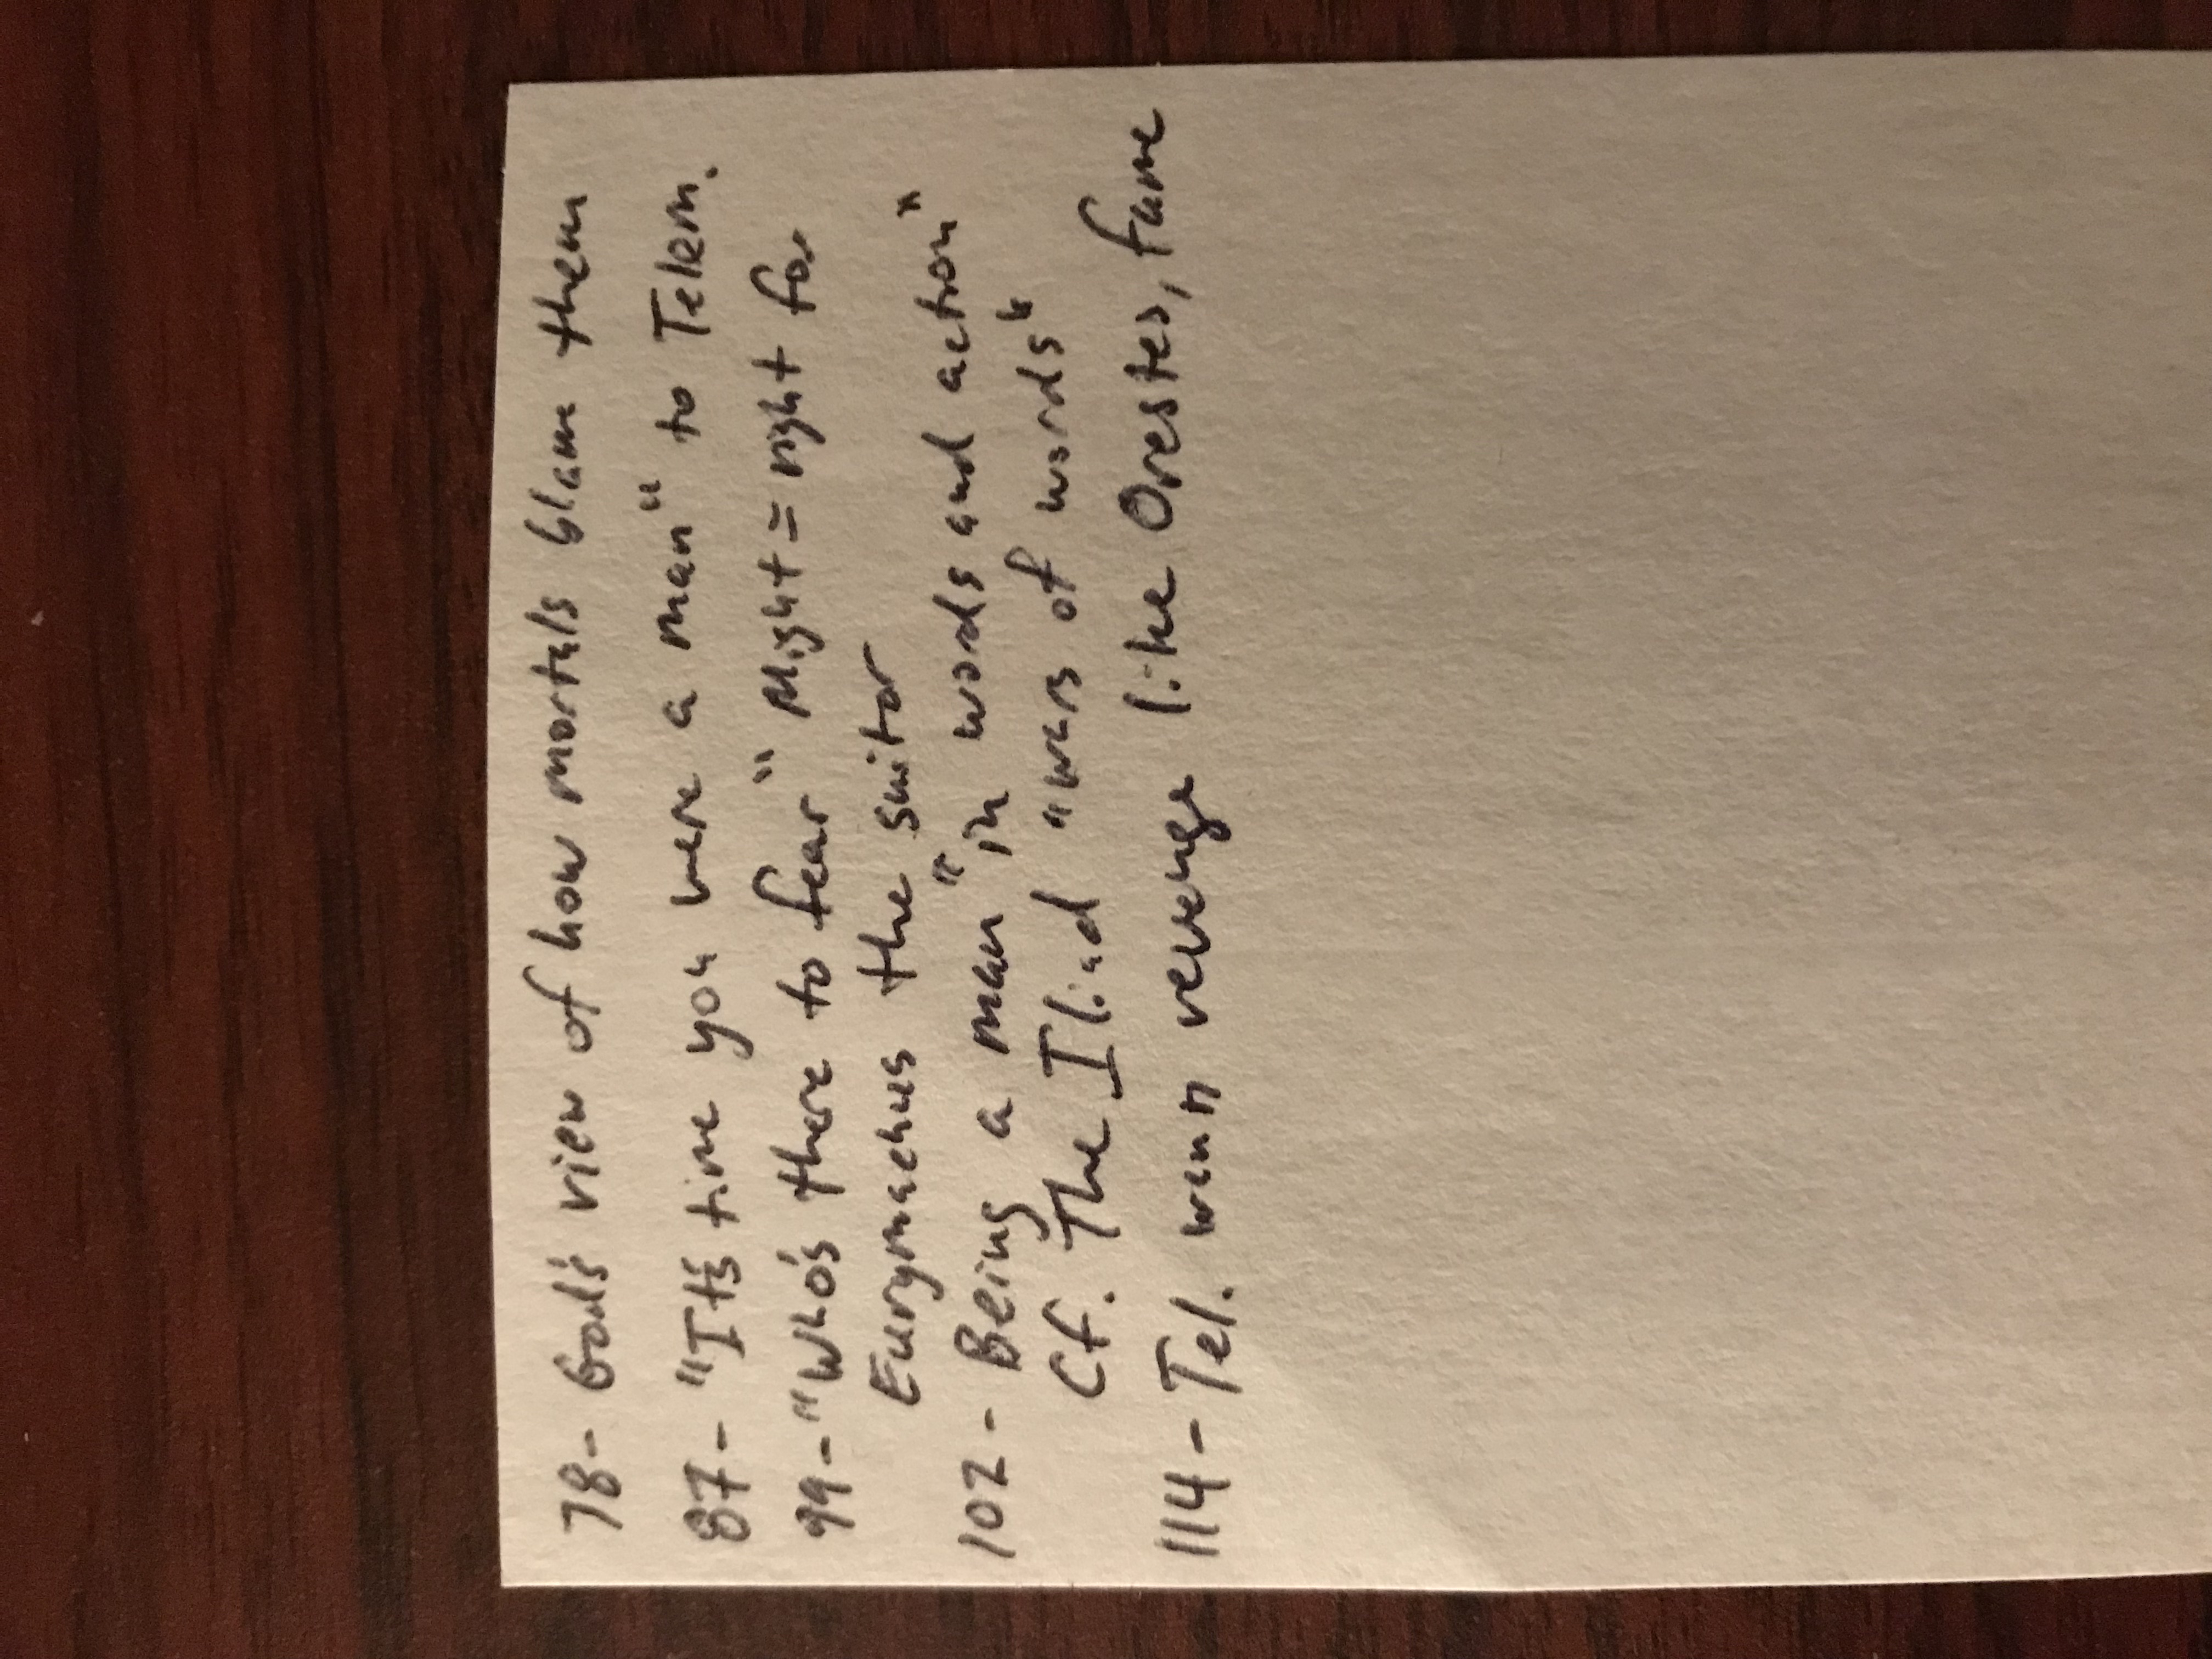
Keep in mind, it won’t always be books that spark thought! I get a lot of thoughts from the podcasts, YouTube videos, etc., so instead of page numbers, you could do minutes into an episode or video. It’s flexible.
Cool! So far we’ve got our literature notes going for this book.
3. Zettle time!
Later that day, maybe after dinner, I’ll look over these literature notes (written on the back of your bibliography card) and develop them into permanent notes that live in my main slipbox.
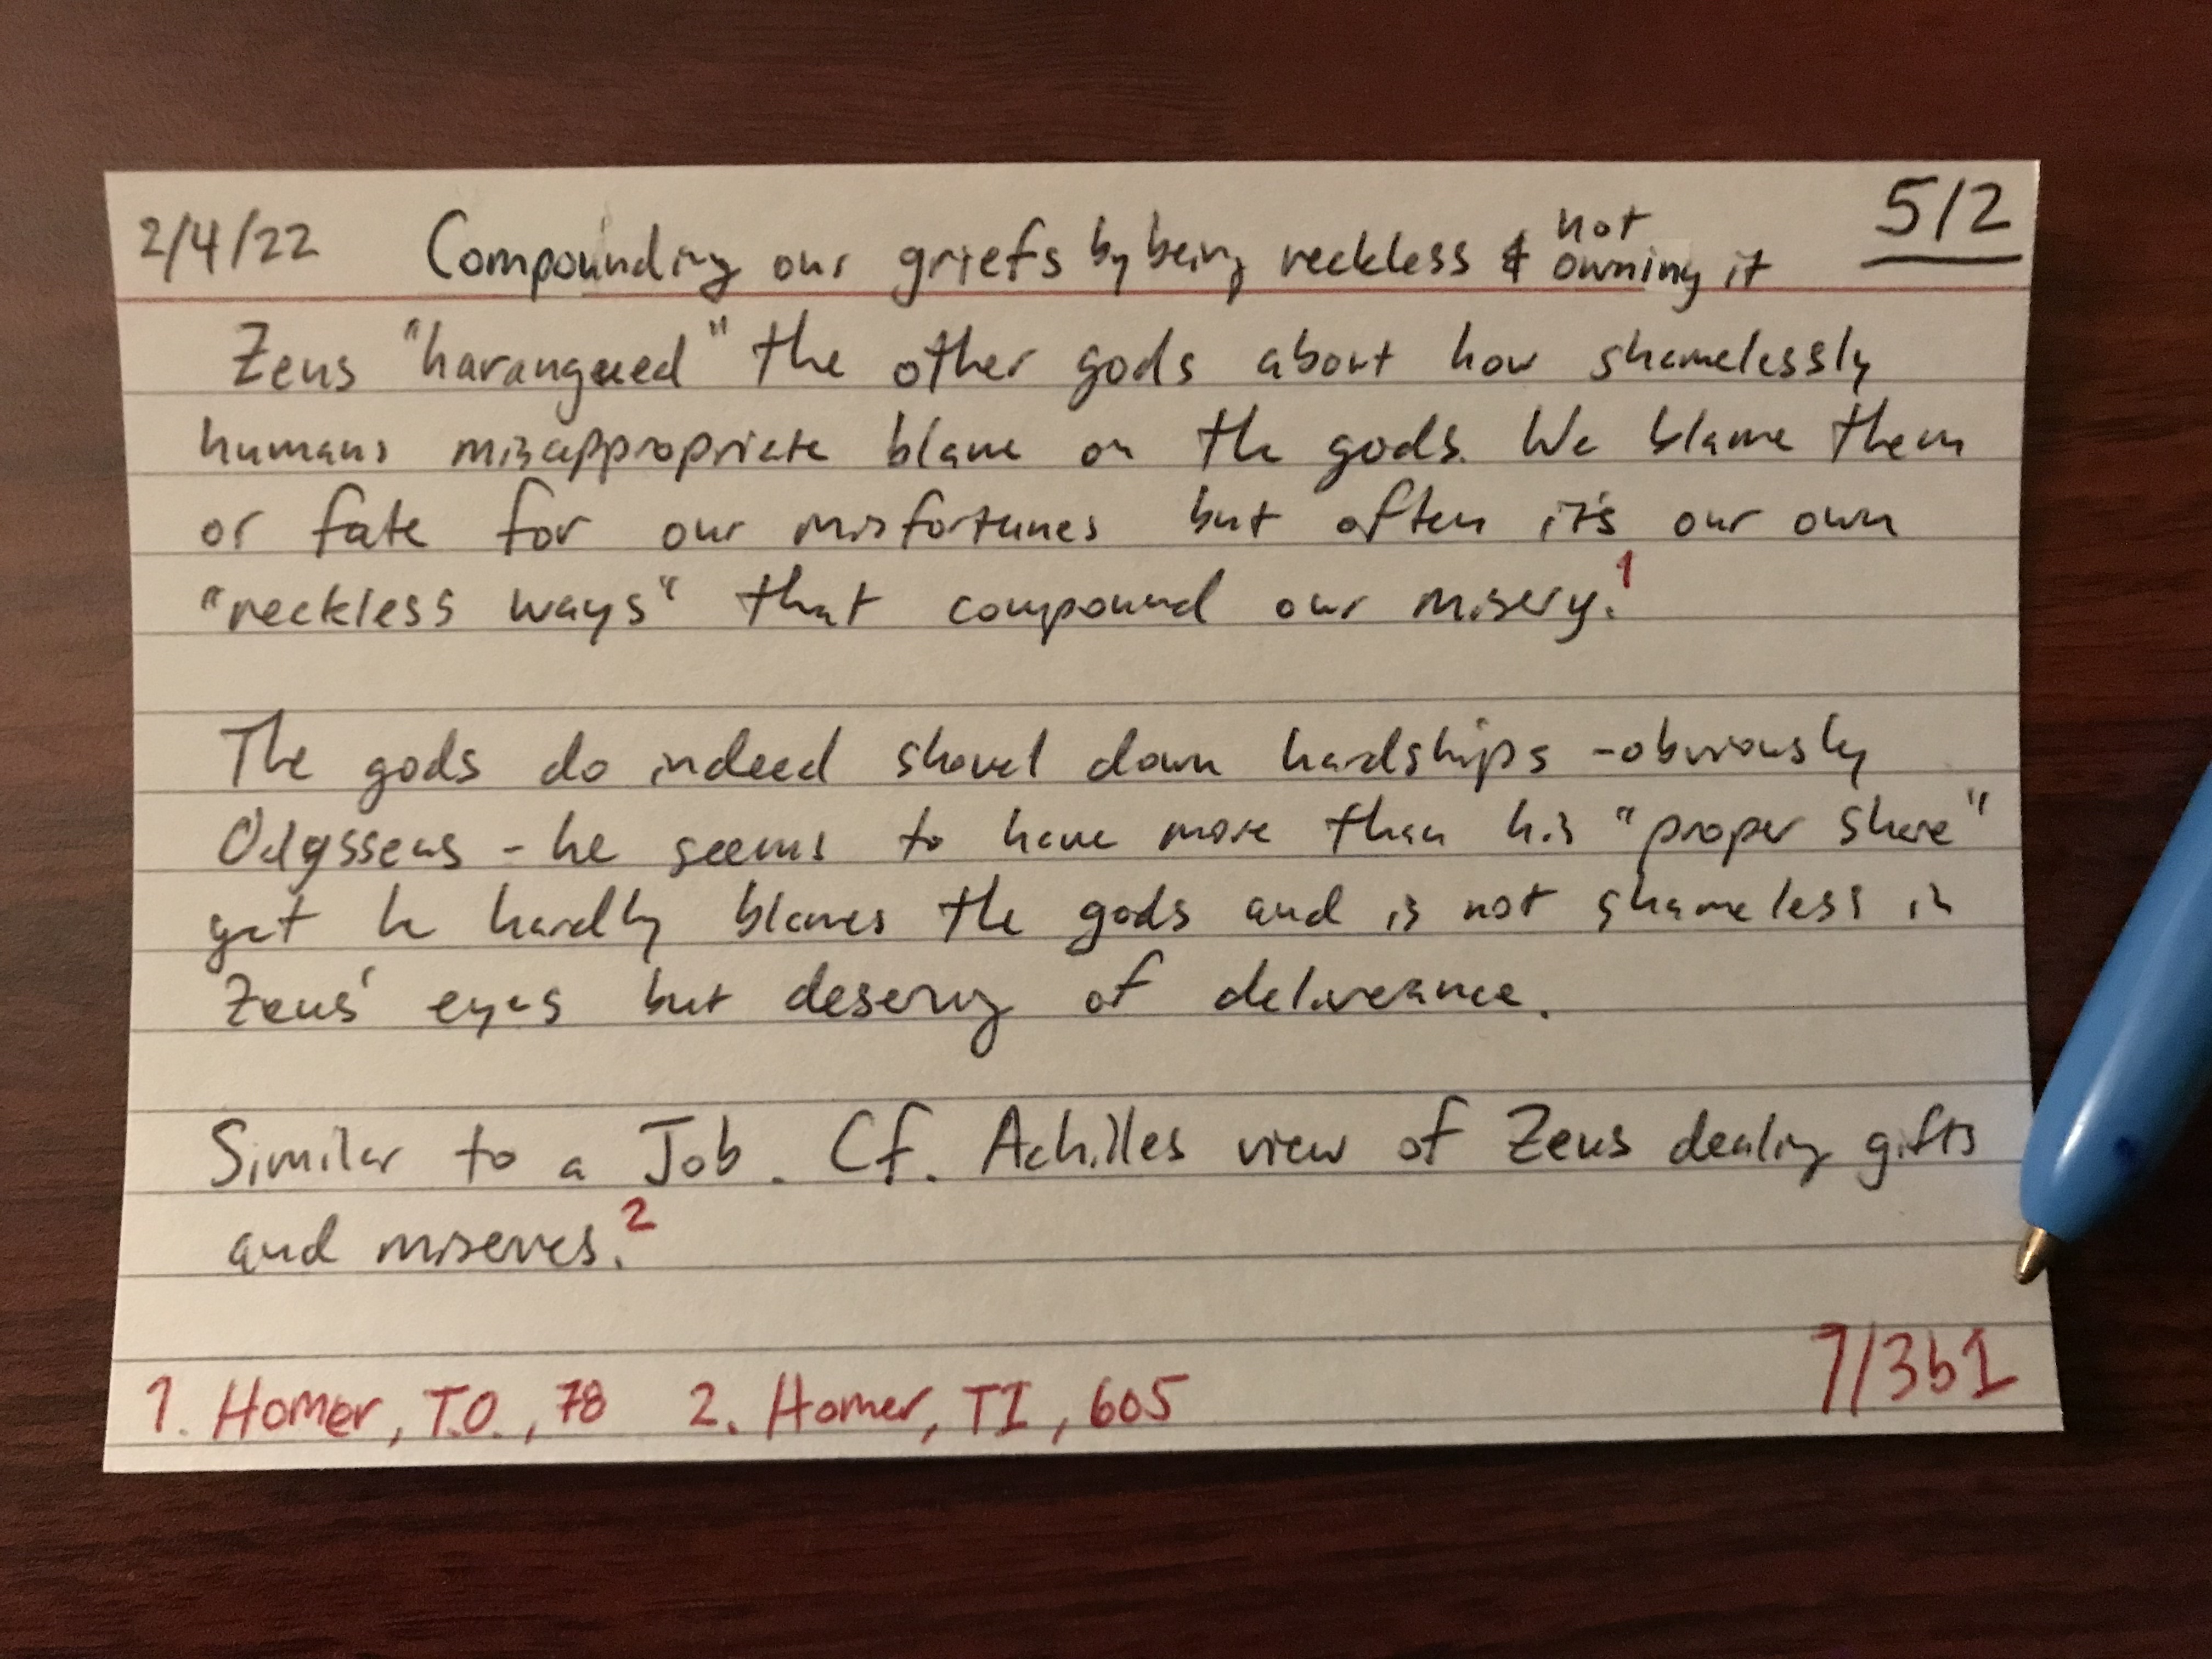
For example, my first note on page 78 about how Zeus haranguing the other gods about how silly we are in blaming them for all our misfortunes. I’ll zettle it. I pulled out a blank 4x6 card, and started writing.
I’ll worry about the index and title later, after I get the idea fleshed out. While (and only while, not before hand, which is so cool!) I was writing this I thought of Job, so I added that. I also recalled Achilles' point of view about Zeus from The Iliad, so I added that also.
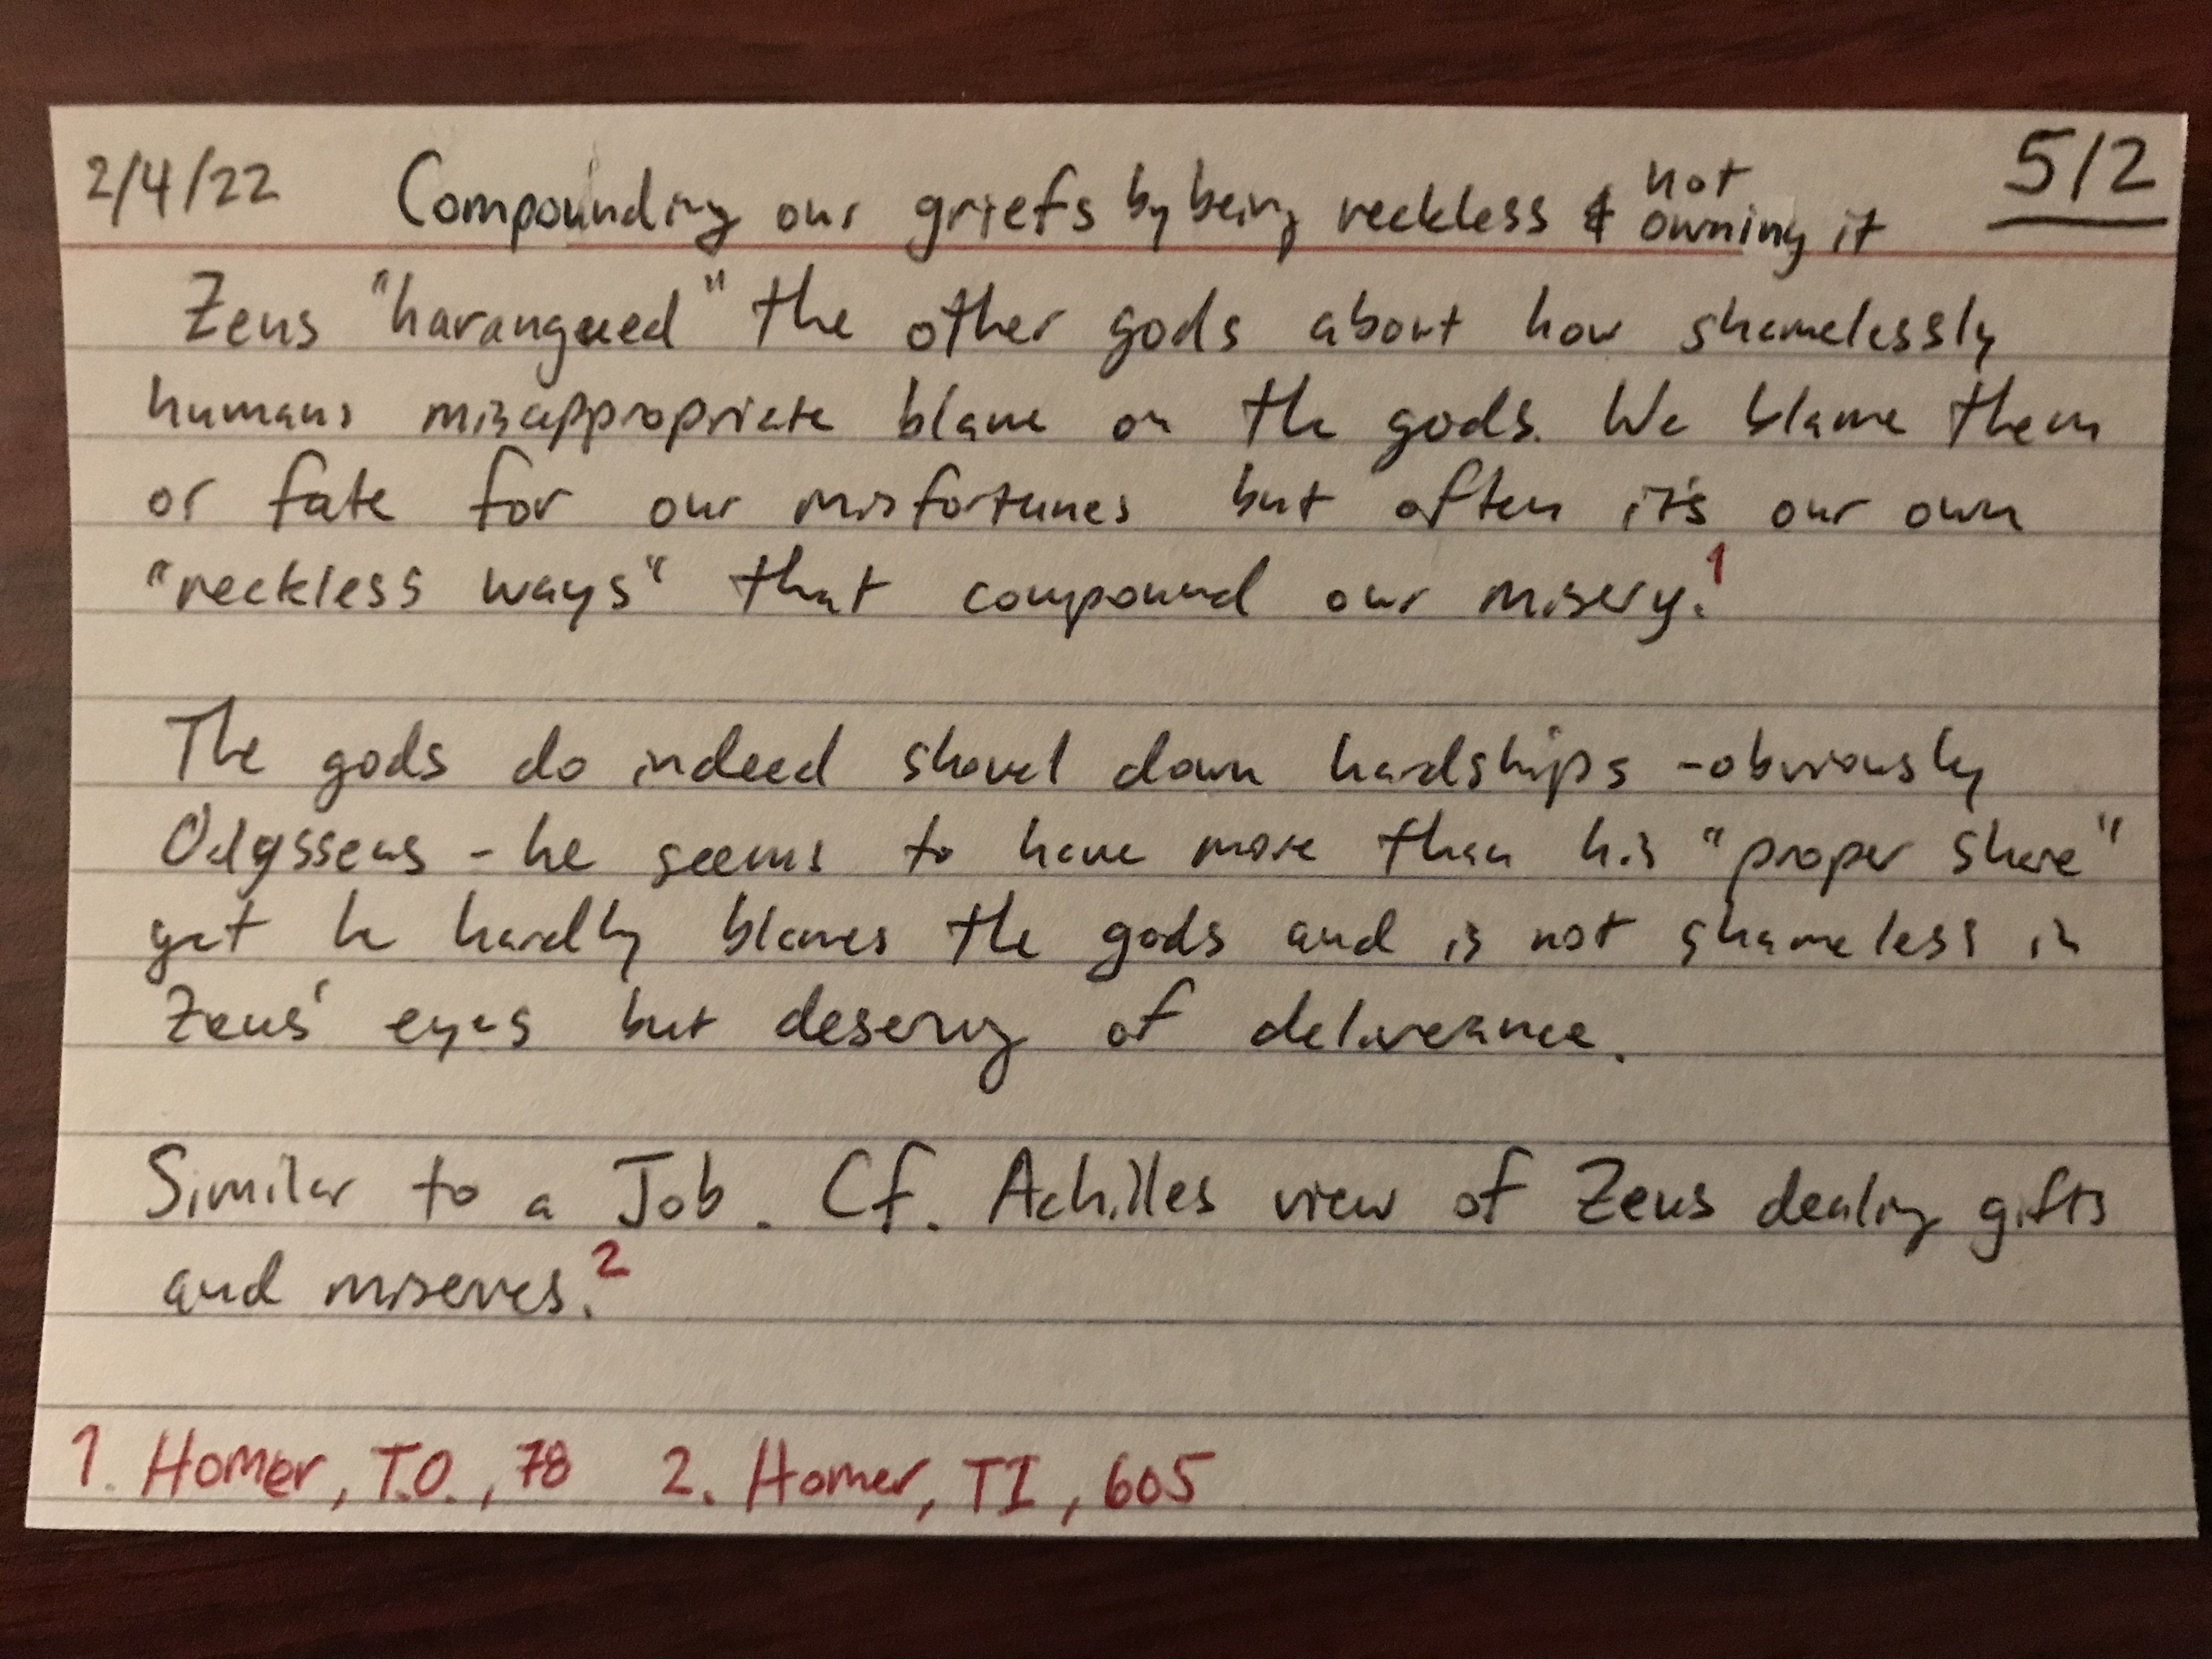
I mark in red pen my footnotes to the texts, then at the bottom left, I reference to my bibliography card. You’ll notice the first one links to The Odyssey, and that’s why there’s that ‘T.O.’. It’s a shortcode for the title, so I don’t have to write it all out each time. I then give the page number of the book.
Next I’ll give the card a short title at the top, write the date (I just like to), and then I have to decide where it goes in my main box (the black one). I’ll file it right behind my other Homer zettles/card, making it 5/2 (right behind 5/1; I’ll talk more about indexing in a bit). Great! I’ve got a new permanent note that will live amongst my other thoughts in the main box.
4. Give it an index
Figuring out the indexing scheme was and still is a challenge for me at times, I won’t lie. It wasn’t explained well enough for me in Ahrens book but I did find a helpful breakdown from an aforementioned resource. I recommend reading it if you’re seriously considering doing an analog Zettlekästen.

Just a couple more things to consider before we’re done with this one:
5. Linking
- Intra-card Linking
Does this card have ideas that link to other places in my box? I look around at my cards and see a card that talks about suffering and how it can make or break us (card
7/3b1). I think there’s a connection there, especially how Odysseus bears his sufferings, going through challenges refines the morals within or shows the lack thereof. I want to mark this connection by noting the link(s) inredat the bottom right:
 I’ll also go to card
 7/3b1 and reflect back the link to 5/2. This is how the network of the external brain starts to grow!
- Linking to Bibliography index
Now I’ll go back to my The Odyssey card for Homer and let it know there’s a zettle out there at
5/2. There are a few ways you could do this. You could link back each zettle next to the literature note, which is a great idea. Or you could only write down the most important zettle indicies on your bibliography card to save space. Either way, each zettle will have a reference to this bibilography note. Try out each and see how it goes!
Use that pencil if you’re worried about making mistakes, but don’t let imperfection slow you down. Luhmann’s system was described by scholars as “rough”, not fluid, not rigid, but enough structure to unlock enormous thinking and writing power. There are mistakes and inconsistencies in his Zettlekästen as it evolved over time, and yours and mine will too. But at the end of the day, this is your baby, no one elses. Just a quick plug there.
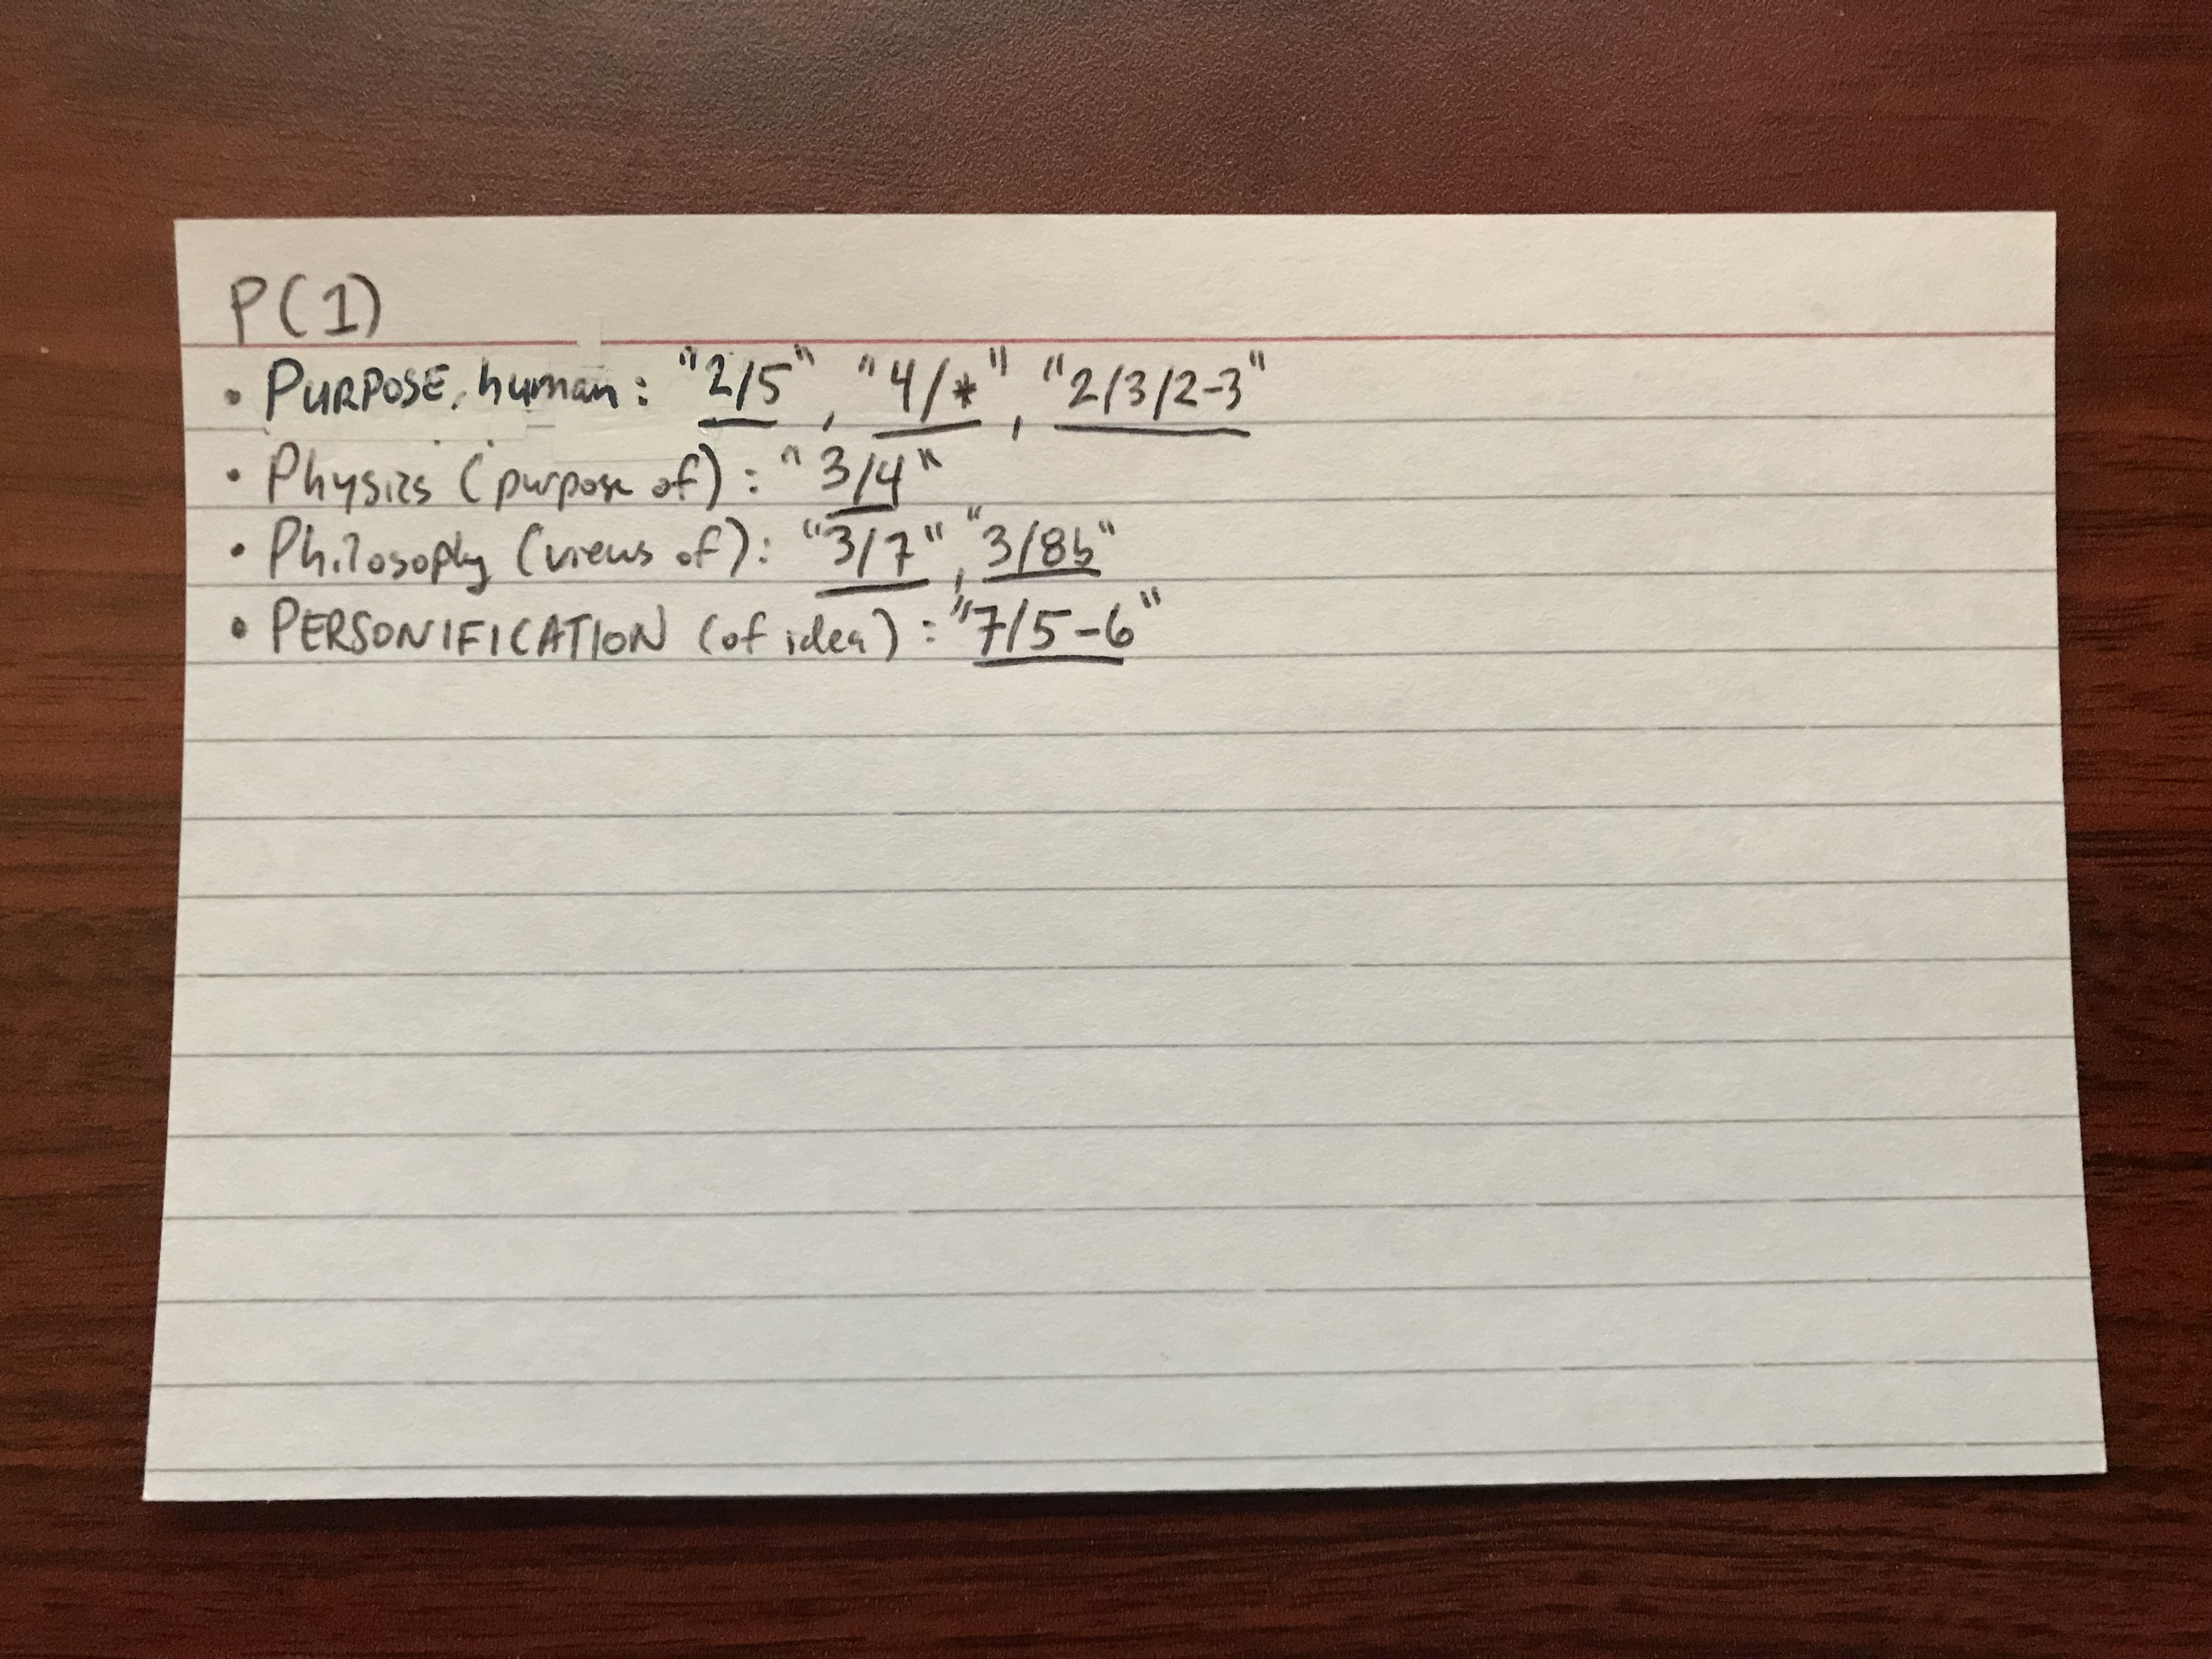
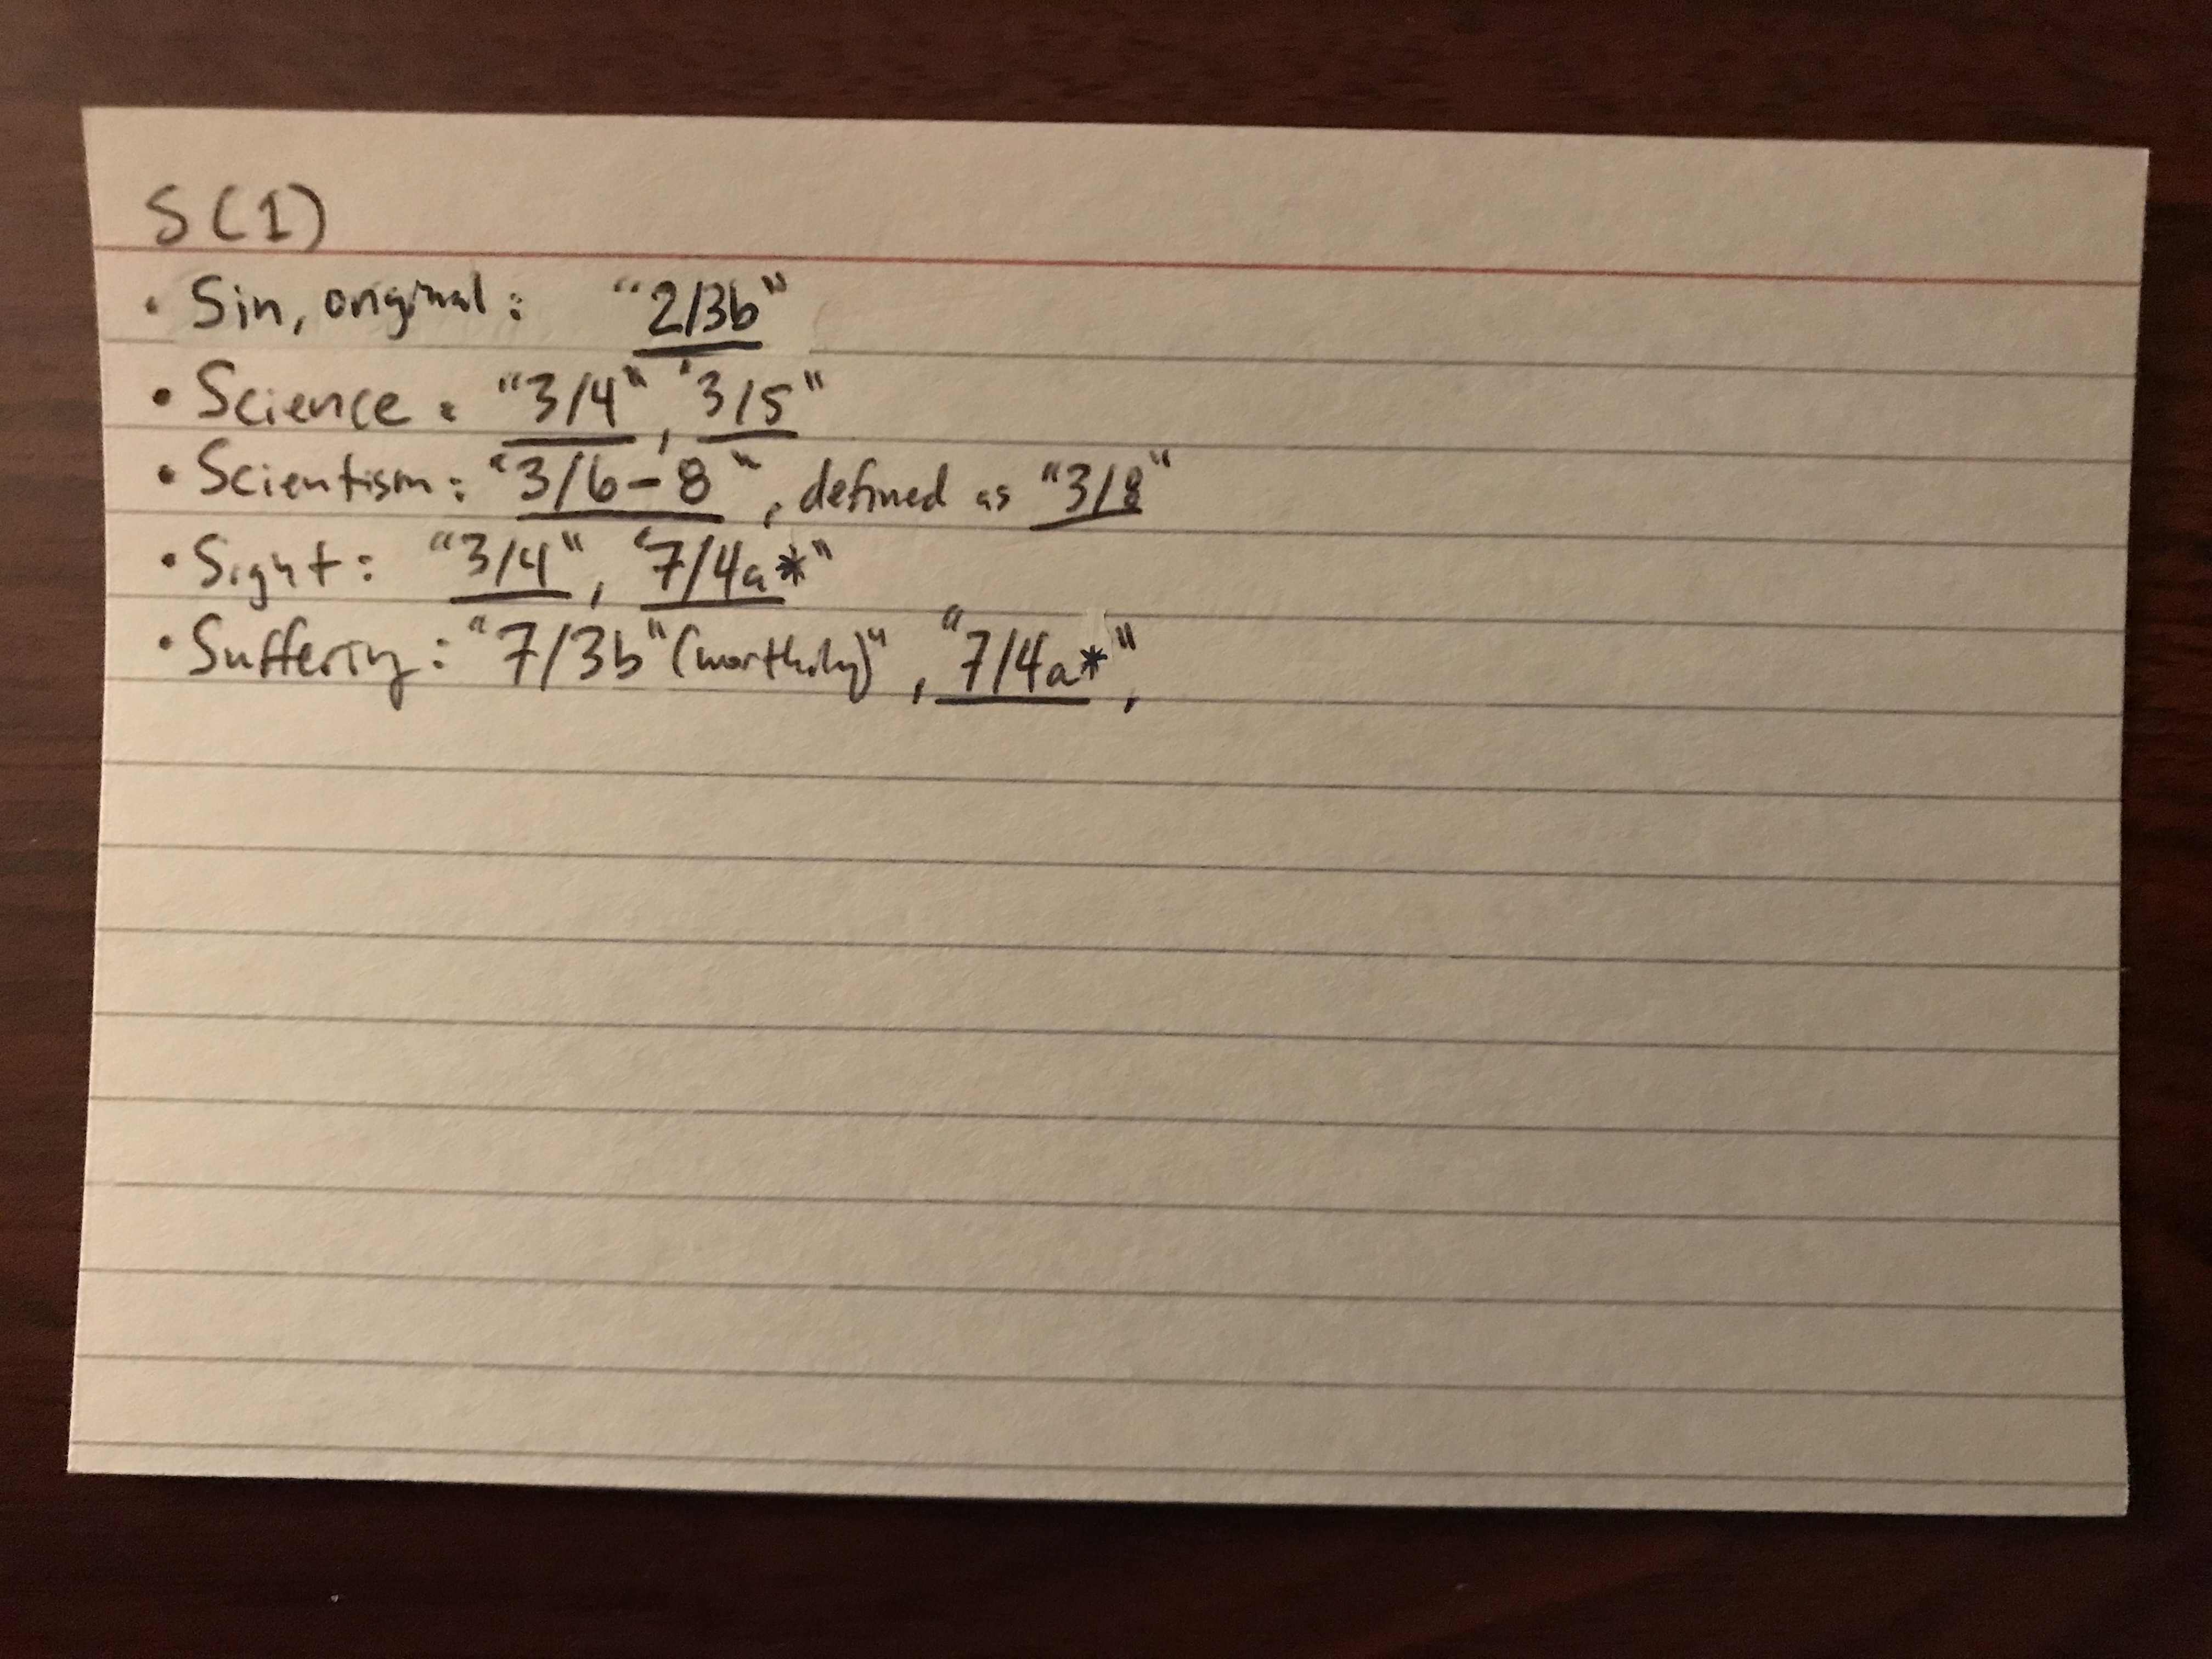
- Keyword index linking Do you remember that blue-ish box with the clear top? That’s my keyword or topic index. Like my bibilography box, it’s also arranged in alphabetical order to make it easier to find things, only this time it’s not authors but ideas. I’d say don’t stress doing this step until you get comfortable with the basic zettling process and have done a few dozen cards. Once you start to see topics emerging, then go ahead and enter some in.
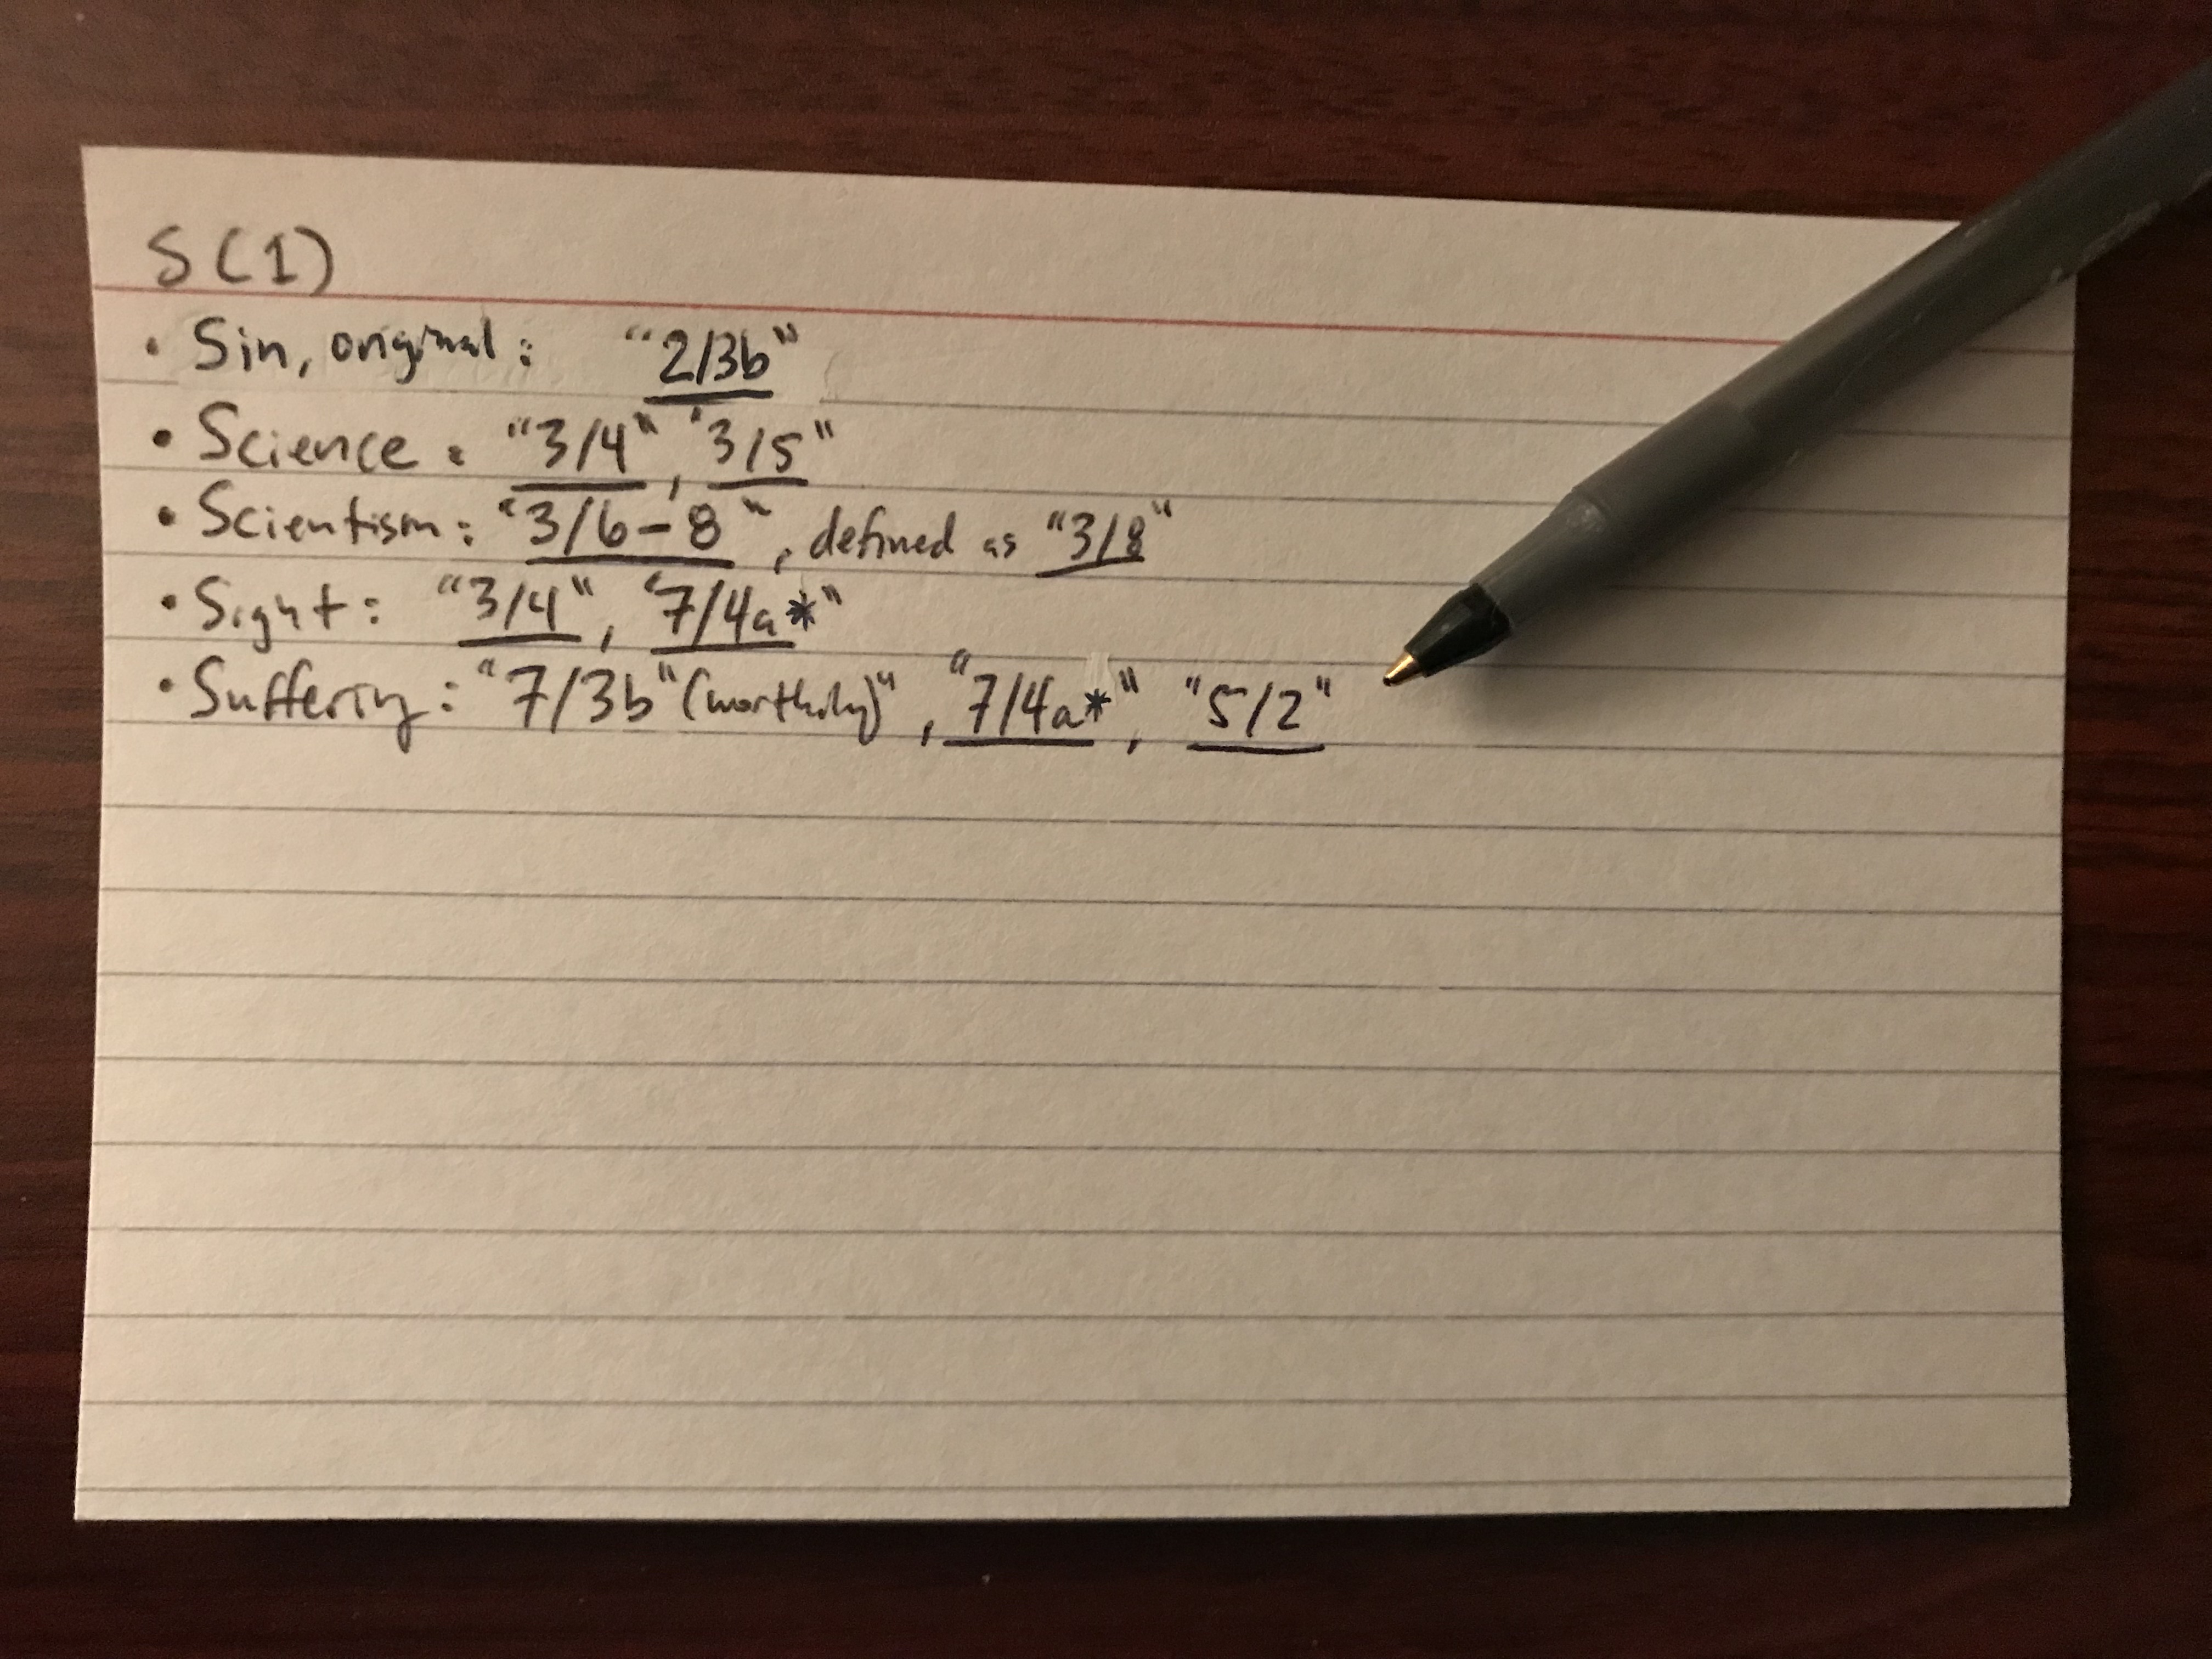
This card, 5/2 deals with suffering. It also deals with potentially many other subjects but I’ll only do what’s easy: if I can’t think of anything else off the top of my head I’ll just do what comes to mind. I’ll file it under “S” > “Suffering. Here’s what the card looked like before I entered it in:
 Now I’ll just add the index of my latest card about suffering (the one about Odysseus,
 5/2)
And that, my friends, is basically it. If the thought came from a fleeting note, I’d skip the bibilography stuff and just go straight to the zettling, indexing, and keyword indexing (if applicable for that card). But that’s it. It’s so much fun.
Conclusion
What about the rest of the space on the front of the bibliography? What’s up with different color cards? There are some more things I could talk about, but this post is loooong and already probably information overload. I hope this is helpful. I know it might seem arbitrary, but I know this system works. It has changed my life, just ask me about it sometime. That said, if you don’t like the way I show something here, feel free to try it out with your own flair. I’d love to see how you implement it.
If you have questions or would like more posts on this, feel free to contact me at my contact info. Thank you!
Credits:
- A big thanks to my friend Tyler for the feedback and help on the Literature notes section
- A big thanks to Scott Scheper and his work to make things clearer for me